What to do with all those Easter Eggs – Easter Egg Brownie Bites

So the bunny has been, the long weekend has ended and I still have easter eggs left on my kitchen table. I think there might be something wrong with me. I did get sick over easter, so perhaps the sickness entered my brain and altered my chocolate lobe? Are there any doctors out there that can recommend treatment? Particularly as I feel like I cannot scavenge for half price eggs this year as they might just end up going to waste. Although if YOU, my lovely reader, have been able to scrounge some super cheap eggs or have any left over and are wondering what to do with them, read on. I have some suggestions. Either way, here is the story of my easter and the terrible affliction that I seem to have been left with.

It started with a strange anomaly with the bourke st bakery flourless chocolate cake.

I only had one piece. Yes, you read that right. One.

No matter, no worries, all things must pass. Right?

Wrong.

Out of all these easter goodies from my beautiful students, I just didn’t feel like eating much.

Even my favourite Lindt bunnies seemed to have lost their jingly allure.

so I put these cute bunnies on top of some cupcakes to take to the S family for easter.

Didn’t actually eat any. Despite them being super cute.

I rallied a little with some delicious easter afternoon tea at the Observatory Hotel

Which was, as always, fantastic.

Brilliant service, lovely food, a vast array of tea and great ambiance, I cannot recommend them highly enough.

I also gave myself an easter mani with Bloom ‘Corfu’ and OPI ‘Teenage Dream’. I thought it made them reminiscent of the shimmery easter egg foil and might induce some chocolate appetite.

But I still had many eggs left over. So I decided that I had to get baking and sort myself out.

Which led me to these Easter Egg Brownie Bites. Perhaps one of the easiest recipes ever.

And it’s therapeutic! Sorry Mr Bunny, but you had to go.

After all, perhaps all I needed to do to appease the chocolate gods and restore me to health was a sacrifice?

It is a one bowl recipe and doesn’t even require a mixer of any sort! Easy!

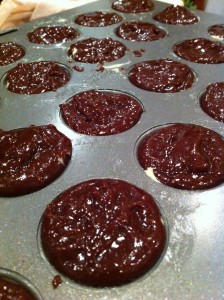
Hide your eggs in the brownie batter (and relieve your lovely weekend memories of easter eggs hunts!)

then bake, bake, bake, my pretties!

Just 12 minutes is all it takes

And then enjoy the warm, gooey, melty centre.

Good lord, these are tasty and last for days as all they need to restore gooey-ness is to be nuked for 30 seconds in the microwave. And, even better, they used up two packets of small easter eggs and make great gifts for morning/afternoon teas.

So, my lovelies, now that I have helped you with your easter egg excess, are you able to help me with my predicament? Do I just need to bite the bullet and eat all the chocolate in order to re-store my factory settings? This blog has documented my love of chocolate over the last two years and I refuse to believe that this is a permanent state of nonchalance re: chocolate. Send me your solutions!

Easter Egg Brownie Bites – Adapted from this recipe from taste.com

Ingredients

150g unsalted butter

100g dark choc easter eggs

100g Lindt milk chocolate easter bunny, chopped.

1 packet mars bar easter eggs

1 packet malteser easter eggs

1/2 cup caster sugar

1 cup plain flour

2 eggs, lightly beaten

Method

1. lightly grease your mini muffin pan (1 1/2 tbsp capacity) and heat your oven to 160 degrees celsius (fan forced)

2. place butter, dark chocolate eggs and chopped up bunny into a microwave safe bowl and nuke them all on 50% power for 2 mins. Make sure that you pause every 30 seconds to stir your chocolate around, you don’t want to burn it!

3. Stir in sugar and leave to cool slightly

4. mix in the flour then eggs making sure that you incorporate each ingredient properly

5. spoon the mix into your muffin pan. As there is no rising agent in this mix you can safely fill them almost to the top of the hole, just remember that some of the batter will be displaced by the egg when you insert it

6. unwrap your easter eggs and push them into the centre of each hole making sure to cover the top of the egg with batter

7. bake for 12 mins

8. eat while still warm!

Note: these will store for a few days if left in an airtight container. If you want to heat them up again (which I highly recommend) you just need to pop them under the grill for a few mins or put them in the microwave for 30 seconds

Good Morning, Vanilla Stewed Rhubarb!

I’ve never been a morning person. I’m a chronic pusher of the snooze button. In fact, I have been known to sleep clear through my alarm. On several occasions. I frequently miss breakfast, my wardrobe is full of things that don’t need ironing and I snore. Well, snoring isn’t strictly relevant to my morning routine but hey, at least I’m honest.

So it might surprise you to know that for the last term i’ve been getting up half an hour earlier than usual in order to do some much needed exercise. As much as I love baking, I was not loving the squishy unable-to-fit-into-my-clothes feeling. Those of you who are fellow not-morning people will attest that the lure of warm sheets and sweet dreams often counteracts any good intentions re: exercise so I needed to come up with some strategies to tumble me willingly (or unwillingly) out of bed.

Setting three separate alarms was a good start

Opening my curtains so that the sun shone on my face was another good one

But I think the most effective was knowing I had enough time for a delicious breakfast

like this one!

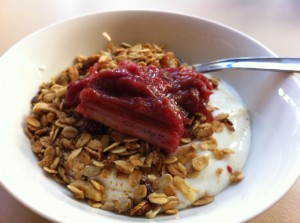
After not being able to find any cereals in the supermarket that weren’t loaded with sugar but actually tasted nice, I decided to make my own granola. After my morning exercise, I sprinkle some of this onto some vanilla yoghurt and then, if i’m super organised (or motivated) I top it off with some stewed rhubarb. Because how delicious is rhubarb!

I started with the rhubarb stewing after I had some rhubarb stalks left over from a cake I made. There were too many precious ruby stems to throw away, yet not enough to make another cake or tart. So I chopped the stems up into 2 inch lengths and whacked them into a saucepan along with one split and de-seeded vanilla bean and two tablespoons of caster sugar. I think that if you really wanted you could omit the sugar to make it healthier, but I quite enjoy the extra sweetness to balance out the tartness of the rhubarb.

it really is as simple as that. Whack it all together over a medium heat

watch the sugar dissolve

and marvel at all the pretty colours!

then simmer for 20 mins or until rhubarb is tender and all the sugar is dissolved.

As the mornings are becoming chilly. you could even reheat the rhubarb before adding it to your breakfast if you need a little bit of warmth. The other thing that you could do is to add warm milk instead of yoghurt then add your warmed up fruit. Either way, this is certainly a breakfast to get out of bed for!

So, my lovelies, are you a morning person? Or do you find yourself similarly cocooned in the warmth of your blankets and unable to wrench yourself free to begin the day?

Stewed Rhubarb

Ingredients

3 stalks of rhubarb (you can increase the quantities if you want to make a bigger batch, just whack in an extra vanilla bean and a little more sugar)

2 tbsp caster sugar

1 vanilla bean, split and de-seeded

Method

1. Wash and trim your rhubarb stalks, then chop each stalk into 2 inch long pieces

2. Place rhubarb in a small saucepan along with sugar and the vanilla bean and seeds

3. Place saucepan over a medium heat and stir occasionally for 20 mins or until rhubarb is tender and the sugar has dissolved

4. Remove saucepan from heat, remove vanilla bean and leave to cool

5. Spoon rhubarb and sauce over cereal or ice-cream and store the rest of your fruit in an airtight container in the fridge for up to two weeks

Caramel Shortbread Cookies and my total lack of organisation

I like to make ‘to do’ lists. I love the sense of achievement that you get when you can cross off an item. However, while I might be organised enough to make these lists, more often than not I will lose them. Counter productive you might think, but… well, yes it is mostly counter productive. Particularly when these lists resurface months later and I realise that I STILL have not completed most of the tasks written there. This blog would be exhibit A.

However, I was very good with my list making before Christmas. Don’t believe me? Well, these cookies are proof, doubters! Christmas was more hectic than usual last year so I had to be super organised to get everything done. In particular my cooking list seemed to breed overnight as I over committed myself for dinners, parties, Kris Kringle gifts, co worker gifts etc. This particular recipe from the December issue of the Donna Hay Magazine was a godsend as it was simple to make, easy to assemble and tasted fabulous. In fact, I was so taken with it that I decided to make a KK gift of cookies and hot chocolate with all the cookies coming from that issue. I will post the other two recipes shortly, but thought I would start with arguably the most tasty (or at least most calorific!)

Cookies and hot chocolate!

All you need to do is whack your butter and sugars all together in your mixer

mix in the flour and roll it all flat

cut your dough into circles and bake

until lightly golden – the recipe says 8-10 mins, I barely needed 7 mins in my oven

pipe the caramel onto your cooled biscuit

and sandwich together

Easy peasy! And you can add a little sprinkle of salt to the caramel before sandwiching for more of a salted caramel shortbread feel. I’ve made these cookies several times since Christmas and they have always gone down well. Easy to make, easy to store, the only thing you need to worry about is rolling your dough too thin, or eating them all in one sitting!

So, lovely reader, are you a procrastinator? Or have you figured out how to get stuff done? And if you’re the latter, can you please let me in on the secret? (Writing this post has been on my weekly ‘to do’ list since January. Go figure.

Caramel Shortbread Cookies – From Donna Hay Magazine

Ingredients

150g butter

1/3 cup (55g) icing sugar

1 tsp vanilla extract

1 1/2 cup (225g) plain flour

2 tbsp cornflour

2/3 cup (200g) dulce de leche (you can also use the Nestle Top N Fill sold in supermarkets in Australia or your own caramel made from condensed milk)

Method

1. Place the butter, sugar and vanilla in a mixer and beat for 8-10 mins or until pale and creamy

2. add the flour and cornflour and mix until a smooth dough forms

3. Roll the dough out (5mm thick) between two sheets of baking paper and place in the fridge for around 30 mins

4. using a 4.5 cm round cookie cutter, cut our your cookies and transfer the dough to a a baking tray

5. bake at 180 degrees celsius for 6-7 mins and check to see if they are done. If not, continue cooking for another few minutes keeping a close eye on these babies!

6. cool cookies on a wire rack

7. Pipe caramel onto half the cookies and sandwich with the remaining ones

Sweet Adventures Death By Chocolate Blog Hop: Mars Bar Crepes with Chocolate Gelato

Oh god. I first had this dessert at a wonderful gelato bar in Crows Nest called Bravo. I admit that it is not the most elegant dessert on the face of the earth but It was so delicious that an evening trip to Bravo for some gelato has become a semi regular occurrence. But alas, sometimes I am just too tired or too plain lazy to make the drive. Therefore, it has become necessary for me to be able to recreate this dessert at home.

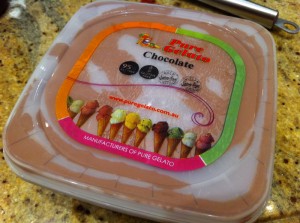
While Bravo make their own amazing gelato, it was more convenient to get my gelato from the another amazing store: Pure Gelato which have their factory in Croydon Park. As I was in the area, I picked up a tub of chocolate gelato. It took all my willpower not to demolish it on the drive home!

Delicious! This gelato is consistently creamy, fresh and full of flavour. I highly recommend it!

I hit a few snags when making the crepes. I’m more of a pancakes kinda girl so I don’t think i’ve ever actually made crepes before. After finding a simple recipe on taste.com I cracked the frying pan out and got to it.

mmmmmm batter…

co ordinated I am not.

No one will argue with that.

But I am a fast learner!

soon I had a nice stack of crepes

(ok the one on the top was really thick but as we have already established, I am pretty lazy and this was the last bit of batter)

then all you need to do is wrap the mars bars in the crepes

times two

snug as a bug in a rug!

Then you just need to nuke them in the microwave for about 40 seconds (make sure you put the heat on medium or 50%) to make the mars bars nice and melty

Then scoop yo icecream and cover in chocolate sauce!

I used Hersheys topping

mmmmmm gooey caramel

I have to admit that before settling on this dish, I had a bit of idea overload for his blog hop. Death By Chocolate should be so easy but everything I thought of was either not chocolatey enough, or so chocolatey that I would never be able to eat it without developing diabetes right there and then. But this baby is just on the right side of decadent to make it actually eatable. Although you may fall into a sugar coma. You have been warned!

Mars Bar Crepes with Chocolate Gelato Recipe

Ingredients

2 crepes

2 normal sized mars bars

1 scoop chocolate icecream/gelato

Chocolate Sauce


Crepe Recipe

Crepe recipe from taste.com can be found here you only need two good crepes for each serving, and they don’t need to be huge, just big enough to wrap your mars bars in


Assembly

1. Wrap each mars bar in a crepe making sure that they are fully wrapped

2. Nuke them in the microwave for roughly 40 seconds at medium heat (or 50%)

3. Scoop out one scoop of icecream and place on top

4. Cover liberally with chocolate sauce


This post was part of the Death By Chocolate Sweet Adventures Blog Hop kindly hosted by The Hungry Australian