Personal Challenges: The Macaron

Everyone has at least one irrational fear. In my case, the list is quite long. Fear of sharks when I swim out so far at the beach that I can’t touch the bottom, fear of the dark (particularly when i’m turning out all the lights before I go to bed at night) and, on a lesser scale, there are quite a few recipes that i’m terrified of trying. One of those recipes is macarons.

The much heralded successor to the cupcake with its delicate outer layer and moist, flavoursome innards has been on my ‘to bake’ list for quite a while. Ive had several unsuccessful attempts and watched others fail dismally which has not helped my confidence. So, this year I thought I would put it on my resolutions list and take small steps throughout the year to achieve it. Last holidays, I went to a small class held by a friend of a friend, I tried the Donna Hay box mix (which were surprisingly good) and I quizzed friends who had been successful in making these fickle treats. Unfortunately, everyone seems to have a different method and a slightly different mix. Everyone seems to swear by contradictory key parts of their recipe which just ends in a sad puddle of confusion and failure for the home cook like me.

So I figured that I would just bite the bullet and begin with the recipe of Adriano Zumbo. Having already tried a different recipe from the book (It Mayo Shock You Cake) and seeing that the macaron recipe had no freaky ingredients and was similarly straightforward, I was quite hopeful. The only thing that this recipe requires that you might not have stocked in your pantry is the powdered egg whites. I bought a big jar of these from The Essential Ingredient in Rozelle a while ago which I think will keep me stocked for many many many batches of macarons.

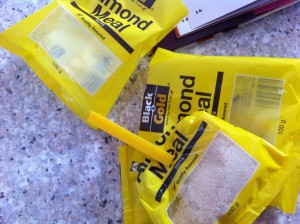
Other than that all you really need is egg whites, almond meal, icing sugar and a bit of water to make your macarons. In terms of specialty equipment, you really need a stand mixer or a second pair of hands as this recipes uses the italian meringue method which involves pouring the boiling sugar syrup into your egg whites mix while you are mixing. If you have a stand mixer you can do this by yourself but if you are using a hand mixer you will need someone else to help you. A sugar thermometer is also necessary to make sure your syrup is at the right temperature before you add it to the mix.

After you’ve done all your mixing you just need to pipe out your mixture onto baking paper and leave it alone for 30 mins. The little tips left from piping will disappear during this time as the mixture settles and forms a skin on top. You can also give your tray a few good whacks on the counter top to make sure that there are no pesky air bubbles lurking in there.

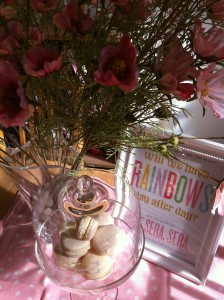
And once they are cooked they will have smooth tops and cute little feet popping up beneath them. Yay!

I chose to fill my macarons with delicious vanilla bean buttercream using Heilala Vanilla. This vanilla bean paste is amazing as it delivers an intense burst of vanilla flavour. It is quite expensive but it uses much less sugar than the varieties sold in the supermarket and is a much more pure vanilla flavour. You can buy it here for $23.50 for a jar of 100ml that will last you a very long time! It’s the kind of thing that I would LOVE to be given for a birthday or christmas or a ‘just because’ kind of gift.

Then all you need to do is pipe your filling onto one macaron

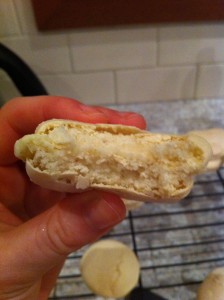
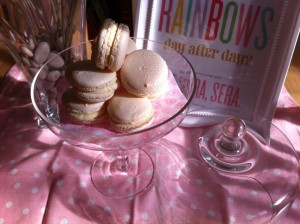
and sandwich together like so!

nom!!!

and so, I have overcome my fear of making macarons! Hooray!

So tell me, my lovelies, what fears do you have? Is it something totally irrational?

Macaron Recipe – from Zumbo 

Ingredients

300g almond meal

300g icing sugar

110g egg whites

300g caster sugar

75g water

2g powdered egg whites

110g egg whites

Method

1. Combine almond meal and icing sugar in a large bowl. Sieve the mixture thoroughly at least twice.

2. Put the egg whites into the bowl of an electric mixer with the whisk attachment

3. Put the caster sugar and water into a small saucepan and place over a low heat. Stir until the sugar has dissolved

4. Once the sugar has dissolved, increase the heat until the mixture is boiling and reaches 118 degrees celsius

5. When the sugar syrup is close to the required temperature, place the powdered egg whites into the mixer bowl with the real egg whites and mix until frothy

6. When the sugar syrup is at the required temperature, pour the sugar syrup in a slow and steady stream down the inside of the mixer bowl while the machine is still mixing. Turn the speed up to high and mix for about 8 minutes (or until the mix has gone from very hot to just warm)

7. Stir the extra egg whites into the sieved almond and icing sugar mix

8. Add the meringue mixture to the almond mixture and fold through. Once it is all combined, continue to fold until the mixture has loosened and is more ‘lava like’. You don’t need to be gentle here like you would with a normal meringue, the aim is to soften the mixture rather than to keep all the air in it

9. Pipe 4cm circles of mixture onto a baking tray making sure that there is enough space between each macaron as they will spread slightly

10. Leave the trays for 30 mins to form a skin on the top. This will be how your macarons gain their ‘feet’ as the skin makes sure that they rise evenly and pop those little feet out the bottom (after 10 mins of resting, turn your oven on to 135 degrees celsius)

11. Place trays in the oven for 16 minutes or until they have a firm outer shell. Remove from the oven and set aside for 2 minutes. Carefully remove one macaron shell from the tray to check if the base is cool and dry. If it is still sticky on the bottom, put the tray back in the oven for another couple of minutes. When they are done, cool them on the trays.

Vanilla Bean Buttercream Filling – From Raspberri Cupcakes

Please click through to this lovely girl’s beautiful blog to find her delicious recipe.

Winter Warmers: Mulled Wine

If you’ve been following me on instagram or twitter (or have come within 10 metres of me in real life) you will know that I’ve been nursing a lousy flu for quite a while. In fact, when I sat down yesterday to think about it, I figured i’ve pretty much been sick since the beginning of May. As Term 2 is always horrific for teachers, I haven’t been able to take much time off to get better so of course, I’m now sick in my holidays.

Part of being sick has involved a persistent and very annoying cough. I’ve tried everything. Hot water and lemon. Hot water and lemon and honey. Lots of roasted garlic. Gargling. Eucalyptus oil on my pillow. Eucalyptus steam bath. Eucalyptus on the soles of my feet. Hot showers. Cough lozenges. Codral. Benadryl. Staying warm. Hot tea. Various herbs and spices. NOTHING WORKED.

So, driven to distraction by the cough last night, I figured a bottle of red wine wouldn’t hurt. And what is better than red wine in winter? Mulled wine of course!

After inhaling the steamy aromas of this mixture, I would say to chuck the eucalyptus steam bath and just stick your head over a pot of mulled wine! Delicious!

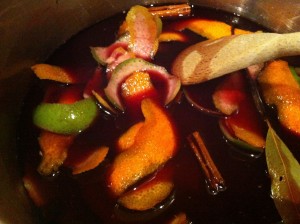
It was a fairly simple recipe that I adapted from yet another Jamie Oliver Recipe involving some sugar, the zest of a lemon, a lime, an orange and the juice of the orange

some spices – vanilla, nutmeg, cinnamon, bay leaves and cloves

a little bit of wine

and then a lot of wine

and a lot of drinking.

Now, I know that a lot of tweeps were very skeptical, but I can honestly say that my cough subsided after a couple of glasses of this aromatic and deeply warming elixir. Whether it was because of the mix, or just the alcohol, i’m really not sure that I care. The point is, it worked! The beauty of this drink is that it has the physical warmth of the liquid, with the added warmth of the spices. You can choose to increase or decrease the quantity/mix of spices as you see fit. I originally started with making half the amount of the Jamie Oliver recipe but have since adapted it to include more citrus and a little more cinnamon and nutmeg. Feel free to play around with it until you feel like it is right. The other thing that is good about this drink is that you can use the cheapest wine you can find and it will still be great.

So, my lovelies, what are your favourite warming spices for winter?

Mulled Wine Recipe – adapted from Jamie Oliver’s Mulled Wine Recipe

Ingredients

1 bottle red wine (the cheaper, the better! Feel free to use cleanskin or cask)

1 large orange

1 lemon

1 lime

125-250g caster sugar (it depends on the sweetness that you like. I quite like it with the full 250g as I like my mulled wine sweet)

4 cloves

1 cinnamon stick

2 bay leaves

1 whole nutmeg

1 vanilla bean

2 star anise

Method

1. Peel long strips of rind from the orange, lemon and lime and place in a medium sized saucepan along with the sugar and the juice of the orange

2. Add the cloves, cinnamon stick, 6 gratings of nutmeg and bay leaves

3. Cut the vanilla bean lengthways and add to the pan

4. Pour in enough wine to cover the sugar and place over a high heat. Stir frequently until the mixture boils and thickens slightly (roughly 5 mins)

5. Pour in the rest of the wine and turn the heat down to low

6. Add the star anise and leave the mixture to heat through. Make sure that you don’t heat the wine up too much or you will boil off the alcohol. And where is the fun in that?

7. ladle into glasses and serve!

Some more sewing adventures!

A few weeks ago my digital kitchen scales broke. So what? I hear you say. So, apparently my baking mojo has broken with it. Even since I have not been able to double check my measurements with my scales, everything I make has seemed to be fatally flawed. I know that I could just go and buy another one but i’m so close to finally paying off my credit card debt that I just don’t want to splash out that sort of moolah for a good set of scales. And so, I have been resorting to my other hobby to keep myself occupied. Sewing!

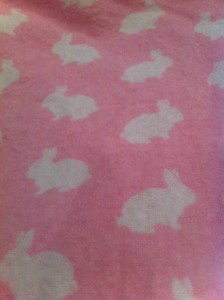
So I bought some super fluffy pink flannelette fabric

of course it had to have bunnies on it

and made myself some pyjama pants!

Mum brought me back the tshirt from the Magnolia Bakery in New York last year.

Excuse the total mess behind me.

In case you couldn’t see in the pic, I cut the fabric upside down.

Oops!

but of course its all a-ok because it means that the bunnies are the right way up for me!

p.s. totally loving mums fleecy cupcake pjs. Might have to whip myself up a pair!

and of course, wearing warm fluffy pjs requires disney. Lots of disney.

Apart from the slight problem cutting the fabric, I was very pleased with how these turned out. This is the first garment i’ve made and i’m still teaching myself all the bits and pieces involved. Of course, I couldn’t stop there. I had known for months that a big costume party was fast approaching. With a theme of ‘medieval’ I was a bit stuck as all the ebay costumes were sexy wench, sexy viking or medieval princess and were either super expensive or just a bit boring. My boy and I never really dress up for parties so, seeing as this was a 30th celebration, we thought that we would surprise everyone and go all out. I didn’t want to go down the ebay route so we tried to figure out some different ideas to fit in with the theme. I have to say that I think my suggestions were pretty good:

  • space vikings (with lots of silver and glitz)
  • ninjas (because who says medieval has to be european? And i’ve always wanted to go to a ninja party)
  • samurais (same as above)

Finally I came up with the idea of Odin (King of the Gods) and Valkryie (female spirits who took the souls of the valiant warriors to eternal bliss with Odin in Valhalla). I won’t post a pic of the boy up here but it is safe to say that our costumes were so complete that no one recognised us when we arrived. I do have a picture of the beard and wig he wore which will give you a bit of an idea…

He wore the same hat as in the picture there and the wig looked just as good in person as it did on the box.

I call that a win! I went down the anima/manga influenced Valkyrie with an electric blue and gold colour scheme.

I whipped up a skirt out of electric blue velour (never again as that fabric is so tricky to sew with!)

cut out some gold velour as a cape

Used a bit of gold spray paint on an old belt and some boots

popped on a blonde wig

and…

voila!

Of course every good valkyrie spends time stitching extra elastic onto Odin’s beard…

I also made a pair of arm warmers out of the extra blue fabric as it was a super cold night but I can’t find a good pic of them at the moment. Overall I was pretty pleased with how the outfits turned out and I’m racking my brain trying to come up with other places to bust out those gold boots. Any ideas, my lovely readers? And what was the best costume you ever wore to a party?

Winter Warmers: Frangelico Hot Chocolate

Now, before I start with this kickass recipe that will warm your cockles this chilly winter, let me tell you a story.

On Friday I went to the Sydney Vivid Festival. Fortunately Unfortunately, as i’m quite clearly no photographer, I did not take any photos. Although the photographers were certainly out in force! I was out with my boy to take a look around at the amazing sights that Vivid had to offer, celebrate the end of a super stressful week and catch up with some friends. We found ourselves at the end of the night needing some warming coffee and cake only to find most places either shut or with an astronomical line waiting to get in. So we ended up at an obscure coffee shop in The Rocks. With two of our party ordering an Irish Coffee, I thought (with my aversion to coffee) – hey, why not make an irish hot chocolate? Normal hot chocolate with the shot of frangelico to make it extra warming and extra tasty! Simple? Yes. Opportunity for the cafe owner to price gouge? Definitely. The waitress returned apologetically to tell me that while an Irish Coffee would be $11.50, essentially the same thing but with hot chocolate powder instead of coffee would be $5.50 for the hot choc PLUS $8.50 for a shot of frangelico. So it’s only a few dollars extra, but really….

So I came home this long weekend and decided to make my own (and decidedly better) Frangelico Hot Chocolate.

It started with some finely grated dark chocolate

shake up some dry ingredients (including horlicks and good quality cocoa)

Whisk it all into some simmering milk

Then add a shot of frangelico

That will chase away the winter blues!

Deliciously rich and lightly hazlenutty, this is hot chocolate is just amazing. I adapted this Jamie Oliver recipe to make it a smaller yield. This recipe will give you two large mugs, enough for you to share it some a special someone (or just got for that second mug yourself. I’m sure you deserve it!) You could also make the hot chocolate without the alcohol, or substitute any other alcohol you like. Perhaps a little grand mariner for an orange hot chocolate?

So, lovely readers, what do you do to stay warm in winter?

Frangelico Hot Chocolate Recipe

Ingredients

500ml (2 cups) milk

1 tbsp Horlicks

1 tbsp cornflour

2 tbsp icing sugar

2 tbsp good quality cocoa powder

50g good dark chocolate (finely grated)

1 shot frangelico for each mug (or any other liquor you would like to add)


Method

1. Add chocolate, horlicks, cornflour, cocoa and icing sugar to a small jar. Screw the lid on tightly and shake well.

2. Place the milk in a small saucepan over medium heat and leave until almost boiling

3. Add the contents of the jar and whisk in well

4. Allow the mix to come to the boil, then pour into two large mugs

5. Stir in the frangelico and enjoy!