Hooray for Winter! Before I started a concerted effort to use seasonal fruit ad veg, I never realised how many wonderful fruits are in season in Winter. I guess there are some good things about Winter after all… apart from flannel sheets, wood fires, hot dinners, hot lunches, hot chocolates, baked goods, pies, hot desserts, snuggles, cuddles… ok… there are LOTS of good things about Winter. This post has a point, I promise!
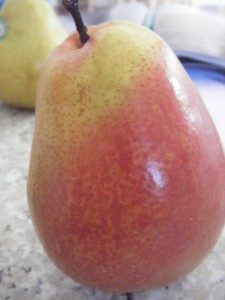
Corella Pears!
Im a big fan of the green Packham Pears (spelling?) but I have never been bothered to try any of the other types. So when I saw the recipe for Brown Sugar Sponge with Caramel Pears on the cover of this months Gourmet Traveller that was celebrating the season of the Corella Pear, I thought it was as good an excuse as any to try a different type of pear. Who could resist the serene blush of the Corella Pear? The firm flesh and sweet juice is definitely swoon worthy.
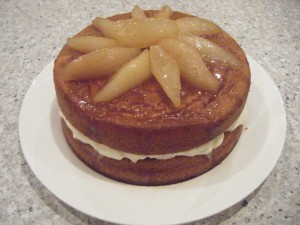
The cake turned out beautifully, and tasted delicious. However, if you have seen the cover of the magazine, you will notice that I made mine half as big. When I was first looking at the recipe, I thought that the four layers were made by making two cakes and cutting them in half. I couldn’t believe it when I realised that this recipe requires you to make FOUR whole cakes that are stacked on top of each other. To appease my ever expanding waistline (sigh.) I decided to halve the recipe and make only two layers.
It turned out quite prettily, it tasted wonderful, so how did this cake nearly spell the end of my kitchen exploits forever?
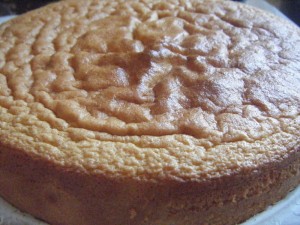
Firstly, I must say that there was nothing wrong with the cake. In fact, it was one of the most delicious sponges I’ve ever tasted. It was light and fluffy but with a nice depth of flavour that I did not expect. It did fall a little after I took it out of the oven which was a bit disappointing. The top became all wrinkly which wasn’t particularly appealing. But I still had a few tricks up my sleeve and wasn’t going to let a few wrinkles get in my way!
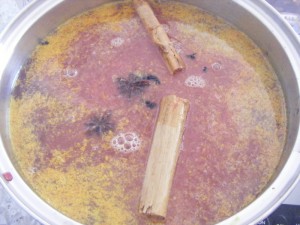
It was the syrup for the Caramelised Pears that almost did me in. It was a beautiful, fragrant syrup with the juice of lemons and blood oranges as well as star anise and cinnamon sticks. I poached the pears in the syrup and then it was time to reduce the liquid for the carmel to be drizzled over the top of the cake. This caramel, was my Waterloo.
I’ve never been great with numbers. The other day, while trying to illustrate a point to one of my classes, I told them that 2+2 didn’t equal 4. And didn’t realise my mistake until one of them told me. So I was all set to halve the ingredients for this liquid as I had halved everything else for this cake. Then I got cocky. I had bought 6 large pears because I couldn’t be bothered to buy 12 small ones and I thought, well, even though I have bought half as many pears, they are twice as big and I should therefore make the full amount of syrup.
I followed the recipe to the letter and transferred the liquid to a high sided frying pan to reduce on a medium high heat for half an hour. Forty five minutes later I was still staring at the syrup that was stubbornly refusing to reduce. I turned the heat up, and began pottering around the kitchen. The logic I was using was that whenever a pot boils over on the stove, I hear it in time due to the sizzling of the water on the hot plate, so therefore if the syrup began to boil over I would hear the rolling boil and the sizzling of the syrup right? Wrong.
Drip, drip, drip, went the boiling syrup over the laminate bench tops onto the polished floorboards. I rushed over to lift the frying pan up off the electric stove and a column of flame shot up from beneath it! I had the sense of mind not to throw the nearest tea towel onto the fire, but I had NO idea what else I should do. In an increasing state of panic as the flames rose higher I started yelling and my amazing sister ran and got a heavy bath towel to smother the flames.
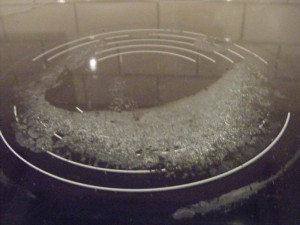
The bench tops were saved, the floor was saved but my poor stove top is still covered with blistered, charred, sugary residue. And the caramel wasn’t all that nice when I finished it the next day.
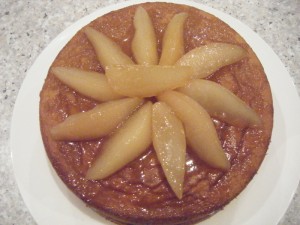 The caramel ended up being more of a syrup but at least it still looked good!
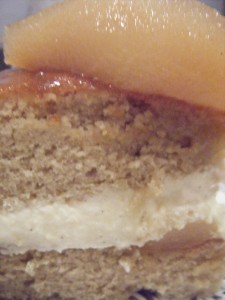 As I had a few slices of pear left over, I layered them between the two cakes along with a layer of vanilla whipped cream
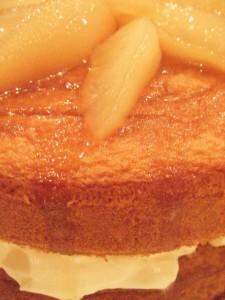 My oh my, this cake was worth the effort!
So, my lovelies, what have been your kitchen disasters? Have you set anything on fire? And do you have any suggestions for how to save my poor hot plate?!
Brown Sugar Sponge with Caramel Pears – Adapted from the August edition of Gourmet Traveller
Brown Sugar Sponge – Ingredients
6 eggs
80g brown sugar
80g caster sugar
1 vanilla bean, seeds scraped
1/8 tsp baking powder
150g plain flour, triple sieved
60g melted butter – cooled slightly
Brown Sugar Sponge – Method
1. Whisk eggs, sugars and vanilla seeds on a high speed until the mixture is tripled in volume and holds a trail (if you find that your mixture is not thickening, try whisking it over a double boiler, this always works for me!)
2. Transfer to a large bowl and sift flour and baking powder in two batches and fold in gently
3. Fold in butter
4. Divide among two greased 20cm cake tins lined with baking paper
5. Bake at 180 degrees celsius for 15-20 mins or until the cakes are dark golden and the centres spring back from pressed
Caramel Pears – Ingredients (This is for the whole amount of syrup, halve or leave as you desire)
750g caster sugar
Juice and rind of 1 1/2 lemon and 1 1/2 oranges (I used a blood orange and it was BEAUTIFUL!)
2 Cinnamon quills
2 Star anise
1 vanilla bean, seeds scraped
10 small or 5-6 large Corella Pears, peeled, halved, cored (can cut them into smaller slices)
90ml pouring cream
30g butter
Caramel Pears – Method
1. Combine sugar, rinds, juices, spices, vanilla bean and seeds and 1 litre of water in a large saucepan and stir over a medium high heat until sugar dissolves
2. Add pears a cover closely with a round of baking paper and weight with a plate. Bring to a simmer
3. Reduce heat to medium and cook until the pears are tender (20-25 mins)
4. Remove pears from the liquid and set aside
5. Strain the liquid into a large deep sided frying pan and simmer over a medium high heat until the mixture reduces to your liking (If you are looking at the picture on the front cover of the magazine, that must have taken them HOURS of reducing to get that consistency, just giving you the heads up)
6. At this point you can add 120ml of dessert wine, I didnt and my syrup still tasted pretty damn good
7. Ad cream and butter and stir until combined
8. Add pears to pan and cook, spooning caramel over the pears until they are glazed, set aside
Assembly
I made a vanilla bean whipped cream by scraping the seeds of one vanilla bean into some cream them whipping to a light consistency. I layered half the pear slices over the top of one cake then spread the cream over the top. On top of that I placed the second cake then arranged slices of pears over the top. I poured syrup (it didn’t really turn into a caramel) over the top and let it drizzle down the side. If you made the full batch of syrup you will have a lot left over and you can serve this with slices of the cake. Enjoy!

