There’s been a murder in my kitchen…

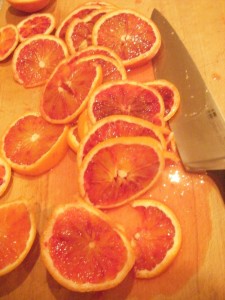
The victim? Blood Oranges.

Scalped

Sliced

and disemboweled.

All in the name of dessert.

But oh my, it was a good dessert! This Blood Orange and Vanilla Syrup Cake was another experiment with seasonal winter fruits. I had been eyeing it off in my Seasons cookbook by Donna Hay since the mothership bought it for me last Christmas. As my weakness for all things citrusy and syrupy have been well documented on this blog, this cake was a natural progression from the basic syrup cake to a prettier, deeper flavoured dish.

Easy to prepare, this cake didn’t take long to cook and the only difficulty I had was getting the blood orange stains out of my chopping board! I didn’t realise that the gorgeous deep red juice would be so stubborn! I shook my fist at it. Then let the mothership shoot her tractorbeam of cleanliness at it.

I broke out my bundt pan for this baby

Tah Dah! Golden, puffy goodness!

Note the abundance of progress shots. The deep red of the blood oranges was so beautiful that I got on a bit of a photo taking roll! I just wish that practise made perfect in this case.

Finally, I have a pretty product to photograph. Excitement to the max.

Blood Orange and Vanilla Syrup Cake – Adapted from Seasons by Donna Hay

Ingredients – Topping

1 cup (220g) caster sugar

1/2 cup (125ml) water

1 vanilla bean, split and seeds scraped

3 Blood Oranges, thinly sliced

Method – Topping

1. Place sugar, water and vanilla in a frying pan over medium heat and stir until sugar has dissolved

2. Add orange slices and simmer for 10-15 mins or until the orange is soft. Remove from heat and set aside

Ingredients – Cake

4 eggs

1 cup (220g) caster sugar

1 tsp vanilla extract

1 cup (150g) self raising flour

150g butter

1 cup (120g) almond meal

Method – Cake

1. Place eggs, sugar and vanilla in a bowl and beat until the mixture is thick, pale and triples in size (8-10 min)

2. Sift the flour over the egg mixture and fold through

3. Melt the butter and fold through the cake batter along with the almond meal

4. Line the bottom of a cake tin with the orange slices and remaining syrup. If you are using a spring form tin you might want to wrap your tin in aluminium foil or place a baking tray on the shelf below in the oven in case of any leakage

5. Pour batter over orange slices

6. Bake at 160 degrees celsius for 40 mins or until golden and firm. (I took mine out after about 30 mins)

7. Turn out onto a platter to serve with cream or ice cream.

Crispy, Buttery Golden, Gooey Tarte Tatin

Tarte Tatin is one of those dishes I was always meaning to cook but never seemed to get around to. It seems easy so it goes into that i’ll-cook-it-when-i-cant-be-bothered-cooking-anything-else category. Imagine my surprise when I found the recipe in the MasterChef Season One cookbook and read the comments that “it was a high-risk dish that could go wrong right up to the last minute”. Well, that sure sparked my competative nature and of course I had to try it! How could something that seemed so simple be tricky enough to be in a MasterChef pressure test?

The short answer: it wasnt…

So with my Sous Chef on hand and recent inspiration from the gorgeous French Wench, I set about cooking this wonderfully caramely, deliciously gooey dessert. It is a very straightforward recipe and apart from the stubborn sugar taking forever to melt, there were no real difficulties. Other than my woeful photography that absolutely does not do this dish justice. Please forgive me!

I love the feeling you get when the pastry puffs and goes golden in the oven

Other than making the caramel, there really are no elements to this recipe that anyone should have difficulty with. As long as you can peel and core an apple and cut a circle of pastry, you’re fine. Just do everything step by step and sit back to watch the magic happen!

Yes, I know I totally dropped the ball in the presentation department. But, as Gary would say (tongue in cheek) “its rustic and therefore excuses any mistakes I may make”! It really is the loveliest winer dessert and I am kicking myself that I never tried this recipe earlier. Moreso when I realised that im possibly the only person on the planet who has never tried to cook this. Shame on me!

Yes, I hear you, less self-flagellation more cream!

So my lovelies, what is the recipe that you wish you had tried earlier?

Tarte Tatin Recipe – From the MasterChef Australia Cookbook Volume One

Ingredients

3 Golden Delicious apples

1 tbsp lemon juice

1/2 cup (110g) caster sugar

1 sheet ready rolled puff pastry

20 g unsalted butter

Method

1. Peel the apples and cut into quarters being careful to remove the cores. toss in a bowl with the lemon juice and 1 tbsp of the sugar

2. Cut the pastry into a round slightly larger than a 20cm frying pan and prick with a fork

3. Melt the butter in your frying pan (with an oven proof handle) over medium high heat and sprinkle with the remaining sugar. Cook until a rich caramel forms (keep watching VERY closely to make sure it doesn’t burn!)

4. Arrange the apple quarters in a circular pattern in the pan with the rounded side down. Cook over a medium heat for about 10 mins or until the caramel begins bubbling up in the pan. Shake the pan every now and then to prevent parts from burning.

5. Lay the pastry over the apples and tuck in the overhanging edge. Place the pan into the oven at 200 degrees celsius and cook for around 25 mins or until the pastry is puffed and golden.

6. Stand the tarte in the pan for 10 mins before carefully turning it out onto a serving plate. Serve with cream!

Macarons and Onesies

There are two things I love about winter. Well, there are more than two things but only two of them a relevant to this post! Those two things are as follows:

1. Its cold enough that I can cook whatever I like, whenever I like, for as long as I like

2. I can wear my onesie!

Now, for the uninitiated, a onesie is possibly the most amazing item of sleepwear ever invented. It’s jim jams with feet! Last year, the Ginger Ninja, Helen the Melon and I all bought onesies to keep us toasty through winter. Because everyone laughed at us, we thought we would celebrate our warmth and amazing foresight together at our own exclusive Onesie Party. And thus, the Annual Onesie Party was born.

For our party this year, joined by the Lawyer (onesie-less im afraid), we decided that we would attempt to make macarons. Surely some of the awesomeness of our onesies would rub off on these notoriously difficult biscuits? Unfortunately not. While they were passable, they were not quite a success.

We were not blessed with amazing piping skills…

But they looked alright on the tray…

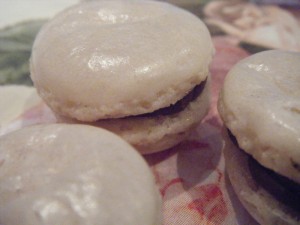
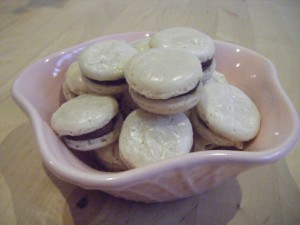
But when cooked they didn’t really have that crisp outer layer and melt in your mouth center. More of a crinkly, paper thin outer layer and a gooey but mostly hollow centre. And, lets face it, they look a little like baby hamburgers. Or is that just me?

They looked ok, but still not a success.

And, after a full day onesie-ing, catching up with friends and cooking, I was knackered and needed a rest

I will post the recipe below and maybe you will have more luck with it. However, the quest for macaron perfection WILL continue until I succeed! Do you have any tips for me my lovelies? I would love to hear from you!

Pink Macaroon Recipe (Yes, its written “Macaroon” in the book) – From Australian Women’s Weekly Cookies Cookbook

Ingredients

3 egg whites

2 tblspoons caster sugar

pink food colouring

1 1/4 cups (200g) icing sugar

1 cup (120g) almond meal

100g chocolate

2 tblspoon thickened cream

Method

1. Beat egg whites until soft peaks form

2. A sugar and food colouring and beat until sugar dissolves

3. Fold in sifted icing sugar and almond meal

4. Pipe mixture onto greased and lined trays

5. Bake at 150 degrees celsius for 20 mins

6. Cool on a wire rack

7. Melt the chocolate and stir in the cream

8. Sandwich macaroons with ganache

Swiss Swirl Ice cream Cake! (Daring Bakers Challenge 2010)

The July 2010 Daring Bakers’ challenge was hosted by Sunita of Sunita’s world – life and food. Sunita challenged everyone to make an ice-cream filled Swiss roll that’s then used to make a bombe with hot fudge. Her recipe is based on an ice cream cake recipe from Taste of Home.

Well, this month was a challenge and a half! Although I have been able to finish most challenges a few weeks before the deadline, some how I found myself pulling this baby together last night in the nick of time. It wasn’t that I found the recipe unappealing (I love ice cream as much as the next woman) but I think I lacked motivation this month in pulling together a recipe that largely consisted of ice cream, in the dead of winter. Some how, trudging home in the cold and the rain after a long day at the chalkface didn’t make me want to complete this recipe. However, this is absolutely something i’m going to pull out when Summertime decides to roll around!

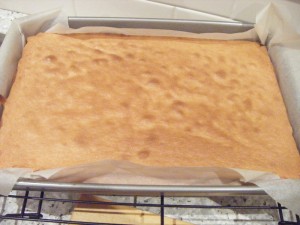
This culinary journey was not without its hiccups. I had considerable difficulty with the initial swiss roll recipe. For reasons unknown, no matter how closely I followed the recipe the damn thing would not rise! I made a few batches of flat, rubbery swiss rolls before finally baking my end product. After reading a few different recipes I decided to try whipping the egg and sugar mixture over a double boiler. Finally, I had the thick, creamy consistency required by the recipe. Finally, I had a light, spongy swiss roll!

And of course, my first alteration to the recipe was to make it a different colour…

Pink! Yes, i’m predictable.

I had decided that I was going to steer clear of my traditional chocolate on chocolate on chocolate approach. After seeing the amazing creations of many fellow Daring Bakers I knew it was high time I experimented a bit! So instead of vanilla ice cream, I tried…

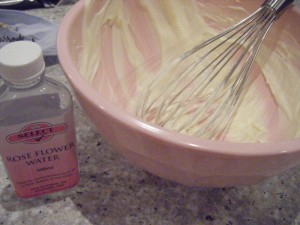
Rosewater! P.s. I  whipped that cream by hand baby!

I had to go with chocolate sauce for the middle because I couldn’t for the life of me figure out a sauce to go with rosewater ice cream.

I have to mention here that I did find the sauce mesmerising. It was like looking into a swirling galaxy

A cross section of swiss roll, ice cream and chocolate sauce.

Next came the final layer of ice cream. But what flavour to go with rosewater? I have to admit that I did cop  out a little bit in this section. I thought that pistachio ice cream would go nicely with the other flavours in this cake. However, I decided to make this ice cream on a night where I was just too tired and over it to do a good job. So I blended up a bunch of pistachios and whacked them in the ice cream.

While the texture was a little grainy as a result of my laziness, the flavour was delicate and pistachio-y

I held my breath while inverting the cake… and crossed my fingers!

Success!!

Cross section!

Thanks again Daring Bakers for a truly challenging  month! This is absolutely a recipe I will use again when the weather turns. However, I suspect I may return to my chocolate overload ways 😀

Alterations to the Recipe

I only slightly altered the recipe which you can find here.

1. I whipped my egg mixture for the swiss roll over a double boiler until it reached the desired consistency

2. I added about 4 or 5 teaspoons of rosewater to the vanilla icecream mixture instead of the vanilla

3. I added just over half a cup of pistachios (ground well) to the second ice cream mixture rather than adding cocoa or chocolate flavouring