In case you missed the memo… right now it’s all about the cake pops.
I’ve always been in awe of bakers like Bakerella who can churn out these delightfully creative and dainty delicacies. I can do a little bit of decorating when I can be bothered, but i’m finding that with an ever increasing workload I just don’t have the time I used to have to do these fiddly recipes. So cake pops got put on the back burner for years. A little bit like macarons did up until recently when I conquered my fear of them. But, in the spirit of trying new things, I decided to have a crack at cake pops. And who better to guide me through this challenge, than my good friend Jen from Stick It! Bakery. Jen makes these beauties in so many different styles and flavours that I have no idea which would be my favourite. Perhaps the packman ones? Or the ninjas? Or the lego heads? Or the cute little bobble men from Despicable Me? HOW CAN I CHOOSE?! So we started with the basics.
first you need to make a cake, let it cool and then break it into chunks in a large bowl
ours was chocolate.
Surprised?
Didn’t think so.
then you use your little fingers to crumble the cake into little crumbs
I really liked this part.
then you mix in enough chocolate icing to make it stick together in a big lump.
Also a favourite part of mine!
then you get a little lump of cake, not too big or too small (just nicely fitting in the palm of your hand)
and roll it into a ball
just like these babies
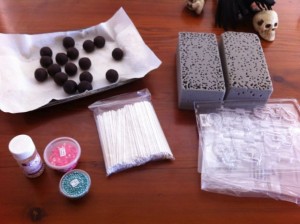 then you need to get all your bits and pieces together
and melt your chocolate
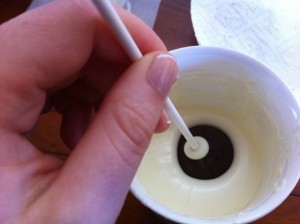
dip the top of each stick into your chocolate and insert about 3/4 of the way into your cake ball
the chocolate helps the stick to stay in place and stop your cake from falling off and rolling away
then you need to melt up some more chocolate
Jen uses a mug as you need something deep enough for you to dip the whole cake ball into it as week as a little bit of the stick.
Ingenious!
the first coat of chocolate!
You need to dip the whole cake ball in then hold it at a 45 degree angle and spin it slowly to allow the excess chocolate to drop off the ball and run a little bit of the way down the lollypop. This will again help the cake stick to the pop and not fall off or roll away.
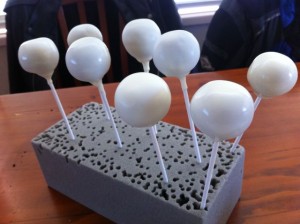
unless you’re an octopus, you’ll need something to stand your pops up in while they dry.
These florists blocks work a treat.
And look at all those holes. That girl must have made thousands of cake pops!
After the first coat is dry, you need to dip your cake pops back in the chocolate for a second coat.
This is when you can apply any extra sprinkles or sparkles that you want to add.
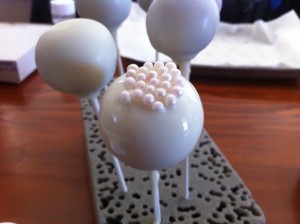
Here we put sugar pearls in a saucer then firmly pressed the top of the cake pop into them.
and voila! Cuteness!
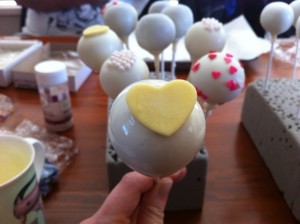
we also added sugar hearts both (big and small) and sugar flowers and sprinkles
Aren’t they pretty?
This was a fun activity and I kept thinking how great it would be to do this with a group of friends. I had my own private class with Jen but she does group classes and has a range of different styles of cake pops that she can teach you how to make. She even makes naughty ones for hens nights! Now I might be the lamest person alive, but I can see that being the perfect warm up for a ripper hens night…
So there is no recipe to go with this post, I couldn’t give away the secrets of Jen’s delicious chocolate cake pops. You will just have to book a class and find out for yourself! Hopefully though, the pictures and instructions will help you if you decide to brave it on your own.
And finally, a giant THANKYOU to Jen for putting up with me for the day, and teaching me the basics with so much patience and care that I feel I might be able to tackle these babies alone next time. Perhaps…


