Another year older…

Last Saturday I woke up thinking “where did all the time go?” I looked behind the sofa, nothing. Under the bed? Nope, not there either. At the bottom of my handbag (a common hiding place for other necessities such as keys, lipstick, spare change)? Nuh uh!

I had to face the startling conclusion that the time had just gone. Poof. Another year, another notch on the wall. But birthdays are not supposed to be about doom and gloom! So despite the time sucking black hole following me around, I put on my apron and started baking for my annual afternoon tea party!

I had been secretly planning this for weeks and had hoped to have my tea party outside in the garden. But as E.E. Cummings would say, the world was “puddle wonderful” as the heavens opened for an almighty deluge. So the garden was not to be, but at least it cooled down so that the heat from my baking wasn’t so uncomfortable. See? Always a silver lining!

On the menu was:

Thumbprint cookies

Vanilla cupcakes

Mini vanilla cupcakes with fondant duckies

*squeak*!

Brownie Bottom Cheesecake (on the bottom left)


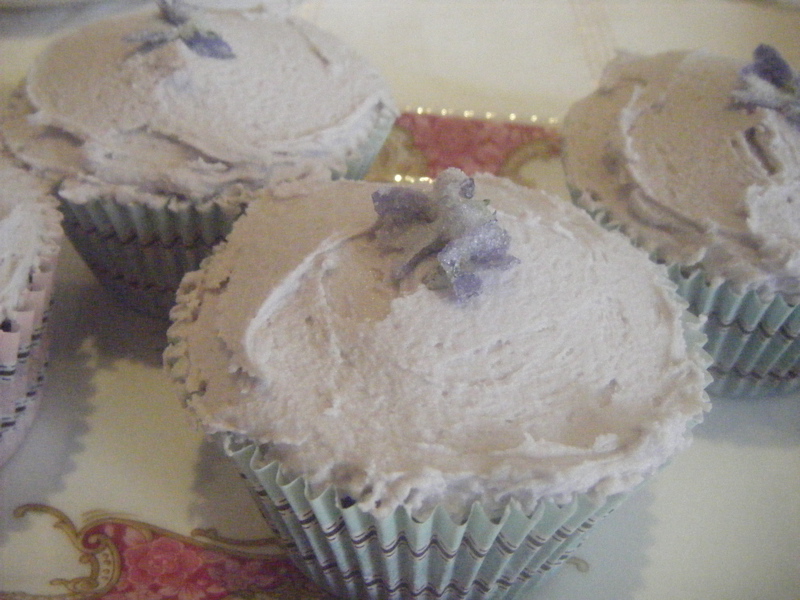
Violet Cream Cupcakes (With sugared violets courtesy of the fabulous Mrs S!) And yes that is the Bourke St Bakery Flourless Chocolate Cake hiding in the corner.

and of course…

Birthday Cake!!

This time filled with strawberry jam and chantilly cream

(and yes, I can see my wonky layers! I didn’t realise chantilly cream was so unstable!)

I was particularly proud of my Violet Cream Cupcakes which came to me in a flash of inspiration. When I was in Adelaide recently, I fell in love with Haighs’ Violet Cream Chocolates. I loved them so much that I got to thinking… I had made Elderflower cupcakes, rosewater cupcakes, why not Violet ones? Furthermore, why not make chocolate cupcakes with Violet Buttercream Icing so that they would be Violet Cream Cupcakes? Brilliant!!

Thankyou to all my lovely friends who made it last Saturday and thanks also for the birthday wishes from those who were otherwise engaged. I had a wonderful time and I hope you all did as well!

So my lovelies, what food do you love to eat on your birthday?

(p.s. I think my camera lens might have been a bit grubby. Oops.)

Violet Cream Cupcake Recipe

Chocolate Cupcake Recipe – from the Hummingbird Bakery Cookbook

Ingredients

100g plain flour

20g cocoa

140g caster sugar

1 1/2 tsp baking powder

40g unsalted butter

120ml full cream milk

1 egg

1/4 tsp vanilla extract

Method

1. Put the flour, cocoa, sugar, baking powder and butter in a bowl and mix until you have a sandy consistency

2. Whisk the milk, egg and vanilla together in a separate bowl

3. Pour half the milk mixture into the flour mixture and beat until smooth and combined

4. Slowly pour the remaining liquids in and beat until smooth

5. Spoon into paper cases and bake for 20-25 mins on 170 degree celsius

Violet Buttercream Icing

Ingredients

250 g icing sugar

80g unsalted butter

25ml milk

a dash of violet essence

purple food colouring

Method

1. Beat butter and sugar until combined

2. gradually add milk until desired consistency is reached

3. Add a dash (maybe half a teaspoon) of violet essence and mix well. Add more essence as desired (bear in mind that if you are making this in advance the flavour will intensify the longer they are left)

4. add food colouring until desired colour is reached

Vanilla Layer Cake (and the joys of pink food)

One of these days I think my kitchen bench is going to collapse under the weight of all my cook books. Truly. I love flipping through the glossy pages of perfectly styled pictures. I love coming across unexpected gems. I love the wonderful prose that accompanies so many cookbooks these days. Granted, Im not sure I need twenty different recipes for white sauce. But you can never have too many chocolate cake recipes! The quest for perfection never ends.

Whenever I feel guilty about how many cookbooks I have I always like to console myself with the fact that I have cooked at least something from every cookbook in my collect. At least I thought I had…

Last year my sister bought me the Magnolia Bakery Cookbook. Hooray! After my excitement wore off I was quickly put out by the complete lack of understandable measurements included in the book. Does anyone outside of America know how many grams one stick of butter is? Ok, so I can google it but how would you interpret “one package of instant pudding mix”? Which packet? Much much should it make? What kind of pudding? ARGH! Everything is also in cup measurements without being accompanied by gram or ounce equivalents. This would be fine, except that the measurement for American cups are different to Australian ones… uh oh.

So there it sat. Lonely and unloved on my bookshelf. Until it was called upon, one courageous wednesday afternoon, to create a truly amazing Vanilla Layer Cake.

I decided to take the plunge and do my best with the equipment and knowledge I had. The mix looked pretty good before it went into the oven, and when it came out, it looked even better!

The mixture produced two flat but pretty tall cakes. I promptly cut their tops off to even them up, and cut them each in half. Cruel? Maybe. Thats just how I roll.

So far, so good.

The next decision was what to use for a filling. After careful consideration I went with the very original choice of vanilla buttercream. Can you blame me? It was pink!

I used my new cutters and super sweet rolling pin to cut out some fondant flowers

Then went to town!

I felt like there was still something missing from the decoration but as it was only a practice, I figured it would still be ok! And yes, my cake it a little slanty. But it was… erm… intentional?

In the end I was left with a pretty pink four layer vanilla cake! It tasted pretty good too!

And it cuts pretty stable pieces.

It also has a curious knack for disappearing incredibly quickly…

I have a theory. All food tastes better if its pink. Now, my lovelies, would you agree?

Traditional Vanilla Birthday Cake Recipe – From The Magnolia Bakery Cookbook

Ingredients

1 cup (8 ounces) unsalted butter

2 cups sugar

4 large eggs

1 1/2 cups self raising flour

1 1/4 cups plain flour

1 cup milk

1 tsp vanilla extract

Method

1. Preheat oven to 350 degrees fahrenheit

2. Cream the butter until smooth

3. Add sugar gradually and beat until fluffy (about 3 mins)

4. Add the eggs one at a time, beating well after each addition

5. combine the flours and add in four parts, alternating with the milk. Beat well after each addition

6. Add vanilla extract and mix in well

7. Divide batter between two 9 inch round cake pans (the recipe said 3 but I only had two and it worked out pretty damn well) and bake for 20-25 mins or until a skewer comes out clean

8. Let the cakes cool in the pans for ten minutes then remove from the pans and cool completely on a wire rack

9. cut into however many layers you wish and fill with your choice of filling!

Traditional Vanilla Buttercream – From The Magnolia Bakery Cookbook

Ingredients

1 cup (8 ounces) unsalted butter

8 cups icing sugar

1/2 cup milk

2 tsp vanilla extract

Food colouring

Method

1. Place butter in a large mixing bowl with four cups of icing sugar, milk and vanilla extract. Beat until smooth and creamy.

2. Add the remaining sugar one cup at a time, until the icing is the consistency you require (you might not need to add all the sugar, its all up to you)

3. Add food colouring as desired

Daring Bakers’ Doughnuts Challenge (October 2010)

The October 2010 Daring Bakers challenge was hosted by Lori of Butter Me Up. Lori chose to challenge DBers to make doughnuts. She used several sources for her recipes including Alton Brown, Nancy Silverton, Kate Neumann and Epicurious.

When I was at uni I LIVED on donuts. (Yes, I call them donuts, not doughnuts. Oh well!) Although I have been trying many different recipes I hadn’t even considered making my own donuts until now. Why?

Boiling oil.

I am not the most graceful person in the world. I sometimes misjudge the width of doorways and bang into the wall. I tripped UP the stairs yesterday. Me in a kitchen with a pan of boiling oil attempting to deep fry donuts was just an absolute recipe for disaster. Particularly considering my near miss with my Brown Sugar Sponge… which my poor stove still hasn’t recovered from! (Does anyone have any more suggestions of how to get the burnt sugar off my glass cooktop?)

Despite the difficulties I was determined to complete this month’s challenge and enlisted the help of the S family. Their bench tops are granite (or some stone that I have no idea about) and their kitchen is tiled which meant that there would be less opportunity for disaster than in my laminated and polished floorboarded kitchen. I would also have four other people on hand should disaster befall me. Phew! (And they had a stand mixer! Hooray!)

Woohoo! Look at that baby go! Definitely beats doing it by hand!

I did have the difficulty many others had of the dough being too wet. I hate handling overly wet doughs so I must admit that I added flour until I felt it was a good enough consistency. It didn’t seem to hurt the final product though.

See? Too wet and floppy.

Now still wet but much more manageable. Ready for rising!

And boy did that sucker rise!

It looked rather like a sea sponge stuffed into my mixing bowl.

Mixing dough? That I can absolutely do. That was the easy part. Now my palms were starting to sweat and my heart was beginning to race. Sure There was stone and tiles, but hey, something could still go wrong. Who knows? I could still set fire to the curtains or something!

To calm my nerves, we decided to cut the donuts into some different shapes. Squares…

Wiggly rings… and, well, that was about it.

After some difficulties with the temperature, we were ready to fry!

Once the donuts were in the oil it was all plain sailing! I couldnt believe how well they browned and retained their puffiness. The final product before coating in cinnamon sugar had the same consistency as krispy kreme donuts. Hooray! We cooked half the donuts that night and left the rest of the dough to do another slow rise in the fridge.

The next morning the dough had burst out of its cling film armour and was ready to go for round two. We used the same oil to make some more creative shapes.

Some pretty cool letters…

Some more conventional shapes…

Some stars (which were pretty cute)

And a whole bunch more! Some hearts… a cow… a bunny…

I don’t know if it was the second use of the oil or the slow rise in the fridge but it seemed as though the donuts cooked from the second batch had a little more flavour to them. They were all super tasty and covered in sugar and cinnamon they disappeared quick smart!

I need to give a massive thankyou to the S family for letting me use their kitchen and to my wonderful boy for taking all my photos. Could you tell? Yes? Perhaps it was the constant focus, clear photos, lack of shadows and poor lighting the list goes on…

This was by far the challenge that has made me feel the most proud for completing. A wonderful challenge with a recipe that I will definitely use again and again! So my lovelies, is there something that you have cooked that has been a major achievement for you? Something you were proud of cooking without burning down your kitchen?

Yeast Doughnuts – From Alton Brown

Preparation time:
Hands on prep time – 25 minutes
Rising time – 1.5 hours total
Cooking time – 12 minutes

Yield: 20 to 25 doughnuts & 20 to 25 doughnut holes, depending on size

Ingredients
Milk 1.5 cup / 360 ml
Vegetable Shortening 1/3 cup / 80 ml / 70 gm / 2.5 oz (can substitute butter, margarine or lard)
Active Dry Yeast 4.5 teaspoon (2 pkgs.) / 22.5 ml / 14 gm / ½ oz
Warm Water 1/3 cup / 80 ml (95°F to 105°F / 35°C to 41°C)
Eggs, Large, beaten 2
White Granulated Sugar ¼ cup / 60 ml / 55 gm / 2 oz
Table Salt 1.5 teaspoon / 7.5 ml / 9 gm / 1/3 oz
Nutmeg, grated 1 tsp. / 5 ml / 6 gm / ¼ oz
All Purpose Flour 4 2/3 cup / 1,120 ml / 650 gm / 23 oz + extra for dusting surface
Canola Oil DEPENDS on size of vessel you are frying in – you want THREE (3) inches of oil (can substitute any flavorless oil used for frying)

Directions:

  1. Place the milk in a medium saucepan and heat over medium heat just until warm enough to melt the shortening. (Make sure the shortening is melted so that it incorporates well into the batter.)
  2. Place the shortening in a bowl and pour warmed milk over. Set aside.
  3. In a small bowl, sprinkle the yeast over the warm water and let dissolve for 5 minutes. It should get foamy. After 5 minutes, pour the yeast mixture into the large bowl of a stand mixer and add the milk and shortening mixture, first making sure the milk and shortening mixture has cooled to lukewarm.
  4. Add the eggs, sugar, salt, nutmeg, and half of the flour. Using the paddle attachment of your mixer (if you have one), combine the ingredients on low speed until flour is incorporated and then turn the speed up to medium and beat until well combined.
  5. Add the remaining flour, combining on low speed at first, and then increase the speed to medium and beat well.
  6. Change to the dough hook attachment of the mixer and beat on medium speed until the dough pulls away from the bowl and becomes smooth, approximately 3 to 4 minutes (for me this only took about two minutes). If you do not have a dough hook/stand mixer – knead until the dough is smooth and not sticky.
  7. Transfer to a well-oiled bowl, cover, and let rise for 1 hour or until doubled in size.
  8. On a well-floured surface, roll out dough to 3/8-inch (9 mm)thick. (Make sure the surface really is well-floured otherwise your doughnuts will stick to the counter).
  9. Cut out dough using a 2 1/2-inch (65 mm) doughnut cutter or pastry ring or drinking glass and using a 7/8-inch (22 mm) ring for the center whole. Set on floured baking sheet, cover lightly with a tea towel, and let rise for 30 minutes.
  10. Preheat the oil in a deep fryer or Dutch oven to 365 °F/185°C.
  11. Gently place the doughnuts into the oil, 3 to 4 at a time. Cook for 1 minute per side or until golden brown (my doughnuts only took about 30 seconds on each side at this temperature).
  12. Transfer to a cooling rack placed in baking pan. Allow to cool for 15 to 20 minutes prior to glazing, if desired.

March of the (fondant) Penguins

I love my friends. So for Helen the Melons birthday I figured I would continue on the theme of edible presents to show her just how much I love her! Cupcakes were a given, but what to put on top? It had to be different to what I had done previously. No more jungle animals, no more presents… but what?

Here’s a clue… its been pretty cold lately…

Ok so thats not much of a clue.

How about this? Yes, there are some pretty heart decorated ones on top. But that was not the main attraction. Do you like my cupcake carrier? It has two levels! Yay! Hooray for unsquished cupcakes!

Back to the guessing game. Give up?

Penguins!!

Now am I saying that Helen the Melon looks like a penguin? Nuh uh. Does she walk like a penguin? Nope. Does she talk like a penguin? Certainly not! But she is very cute and cuddly like these little guys 😀

So I made her an army of cuddly (and tasty) penguin minions!

Could you eat these little guys?

The cupcakes were the Hummingbird Bakery Vanilla Cupcake recipe which is always a winner with vanilla buttercream. I used the Orchard brand ready to roll white fondant and Wilton black, red and yellow colouring gels to make the penguins.

So my lovelies, what kind of animal would you like to adorn your birthday cupcakes? I need some more inspiration now!