In anticipation of Easter… Easter Egg Marshmallow Fudge!

I’ve had something weighing on my mind recently. Weighing exactly 2.5 kg.

Holy moly. This was one giant packet of chocolate. I bought this in anticipation of Easter. Apparently Easter is really close to Christmas. At least, thats what I surmised after seeing the shops inundated with easter eggs mere weeks after Christmas.

I’m a sucker for the chocolate marshmallow eggs, strawberry cream eggs and turkish delight eggs

However, obsessions aside, I do have to conceed that it is way too early to be eating easter eggs. Boo! So I had to come up with a way to incorporate them into a less ‘holiday’ and more ‘everyday’ food. It had to be rich, it had to be chocoaltey…

Fudge.

Perfect.

Who could resist?

Not I.

So simple, all you need is 350g dark chocolate, 397g condensed milk, 30g butter, a pinch of salt and as many easter eggs/marshmallows as you think you might need. (The original recipe calls for 150g pistachios, but thats pretty boring…)

All you need to do is melt the chocolate, condensed milk, butter and salt in a heavy based saucepan on a low heat.

Try not to eat it at this point. Try…

Stir in the chopped up marshmallows and eggs (quickly because they will start to melt)

and pour the mixture into a tin lined with baking paper (to ensure easy removal!)

Leave to set in the fridge

And did you see the fruit in the fridge? Beside the butter and tim tams?

See, I DO eat normal food. Kind sorta maybe…

Once it is all set, remove from the tin and cut into eatable squares.

Try not to eat it all at once!!

So, my lovelies, what sweet treats are you going to be eating this easter?

Oh waffle maker, how did I survive so long without you?

For years I boycotted Max Brenner. After they introduced their sneaky work choices contracts to cut overtime, holiday pay etc I felt like every cup of hot chocolate was tainted with the sweat of their poor workers. Now however, with the dismantling of work choices, I thought that I might lift the ban and venture in for some chocolatey goodness. After a few heavenly bites of waffle with melted chocolate, the mothership and I reached the same conclusion.

We needed to buy a waffle maker.

And so the search began. We searched high, we searched low, we searched in department stores, in specialty cookware stores but no electric waffle makers were to be found. (It needed to be electric because we are both pretty lazy. Surprised? Didn’t think so)

Finally! We found a Cuisinart electric waffle maker in David Jones Miranda.

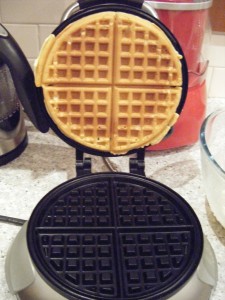
I own a great deal of kitchen gadgets and gizmos, but far out this is the best gadget I have ever bought! The machine is non-stick and all you have to do is close the lid and when it is heated up to the correct temperature this little baby will let out a loud BEEP! to let you know it’s ready for cookin’. But the amazingness doesn’t stop there. When you pour the batter in and close the lid, the machine will let out another BEEP! to let you know that it is cooked. So far, this little baby is 100% accurate 100% of the time. Thats a pretty impressive statistic. Admit it, you’re impressed.

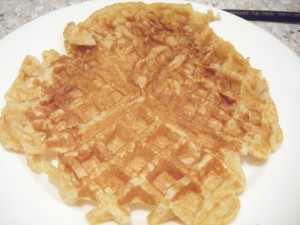
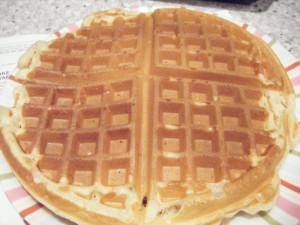
Ok, so human error made this mutant waffle.

I didn’t trust the machine and I was shown to be a fool.

Look at that. Gravity defying waffles. This machine is truly amazing.

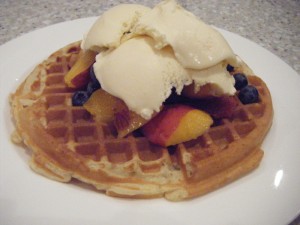
The mothership covered hers with fresh fruit and vanilla icecream.

Phwoar!

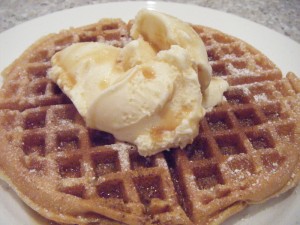
Me? Im more of a traditionalist. Vanilla icecream, maple syrup and icing sugar all the way baby!

But don’t worry, my lovelies, I made one for you!

What would be your ideal waffle topping? What would you like me to incorporate into this delicious mix? I would love to know!

Basic Waffle Recipe

Ingredients

1 cup plain flour

1 tbsp caster sugar

1/2 tbsp baking powder

1/4 tsp baking soda

1/4 tsp salt

1 cup milk

3 tbsp vegetable oil

1 egg

Method

1. There is no easier method than this. Put all ingredients in a bowl and beat until smooth! Leave it to stand for 5 mins which will be the time the waffle maker takes to heat up. Then follow the directions on your waffle maker. Enjoy!!

The Strawberry Affair Continues With: Shortbread Cookies with Strawberry Jam

What do you love more than a cup of hot tea and a jammy biscuit?

Nothing?

Thats as it should be.

Well… not strictly true but we do all love a hot beverage and a tasty cookie don’t we? So what better to make your Valentine than these cute jammy shortbread cookies? They’re red and heart shaped and oh so tasty!

See?

Another recipe from Apples for Jam by Tessa Kiros, these cookies are deceptively easy to make and are great for using up any extra jam you may have lying around say if you recently made a batch of Strawberry and Vanilla Conserve… It’s basically two layers of delicious shortbread sandwiched with strawberry jam and baked until golden and crumbly.

All you need to do is whip up the dough, spread some jam, cover it with another piece of dough and slip that sucker in the oven

Bam! Warm, delicious shortbread.

I thought I would be tricky and cut some shapes into the top piece of dough before putting it on top of the jam. Then I cut rounds out with my circular cookie cutter. You can cut any shapes you like and you could probably cook it pre-cut if you wanted as well. It’s quite a versatile recipe so have a play around with it if you like. I love the fact that they are very similar to Arnotts Raspberry Shortcake cookies and Jammy Dodgers. Make them at home from your left overs and you may just have a double win on your hands.

Yummo!

So if you’re not quite sure what to get your valentine, or if you *gulp* forgot… have a crack at these. Definitely a heart melter. I definitely love myself more after giving them to myself for valentines day…

So, lovelies and lovers, what are you up to this valentines day?

Jam Shortbread – From Apples for Jam by Tessa Kiros

Ingredients

100g butter

100g caster sugar

200g plain flour

1/2 tsp baking powder

1 egg, lightly beaten

a few drops vanilla extract

approx 200g strawberry jam

Method

1. Work the butter and sugar together with your hands until combined

2. Add flour and baking powder and work them in

3. Knead egg and vanilla into the mix and keep working until smooth and well combined

4. Cover with plastic wrap and place the dough into the fridge for 30 mins

5. Divide the dough in half and roll out to a thickness of 2-3 mm

6. Spread the jam over the dough

7. Roll out the second piece of dough and place over the jam (you may want to cut some shapes into this dough before placing on top of the jam, or you may not!)

8. Place into an oven preheated to 170 degrees celsius and bake for 15 mins or until lightly golden

9. Remove from the oven and cool for a few minutes. Cut into desired shapes and leave to cool completely (or eat warm with some tea!)

New Car? Check! Green Ps? Check! New Car Green Ps Cake? Check!

So far this year has been gooooood. I feel more like a proper grown up every day. Ha ha. Only joking! But I have been having a bit of a run of good luck and am also reaping the rewards of a bit of hard work. A few major goals have been ticked off so lets have a tally of where things stand in Katieland

Tally of Amazingness

Full time job – Yes!

New car – Yes!

Green P License – Yes!

General feeling of good health and wellbeing – Yes!

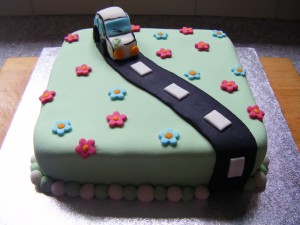
And what better way to celebrate all this newfound goodness but with cake. As if that was a surprise to you! But first we need to narrow our focus. The subject of this cake was always going to by the acquisition of my new car and green Ps. Why? Because it was only a few years ago that I was adamant that I was never going to get my license. Ask the boy. Ask anyone! I had no need for one, and certainly had no need for a car. I have the luxury of living on two very well serviced public transport routes as well as having an army of very obliging friends and family who all drive. Somehow, the prospect of having a lower license than the students im teaching scared me deeply. Hence, the green ps, and…

This baby! And yes, that is me at the wheel.

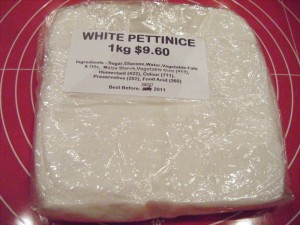
I’ve been working on my fondant skills and I have to say that working with a different type of fondant really helped the process here. I bought some fondant from Cake Decorating Central in Castle Hill where the sales assistants were super helpful.

Not a bad price either (I think?) The brand was Bakels and it was much smoother than the Orchard white fondant that I have used previously. The fondant didn’t stick to the mat or the pin when I rolled it out and it was just generally much much nicer to work with.

But first things first. I started with the standard Magnolia Bakery Vanilla Layer Cake and used chocolate buttercream to fill and dirty ice it. I thought I would be sneaky and try to get three layers out of the cake.

*cough* yes, I cut the layers too thin. Yes, it broke.

But I fixed it! I was always good at jigsaws

So then we went through the usual steps…

Roll out the fondant and cover the cake

Trim off the edges so its all pretty

Add a nice windy road (they’re so fun to drive on!)

Have a crack at making a car.

Now I know that my car is pretty dodgy, but cut me some slack! First time car sculptor here!

Add some pretty flowers and you’re set!

And yes, I added some little green P plates to my car.

Keeping it real.

I did learn some lessons from my last foray into cake decorating, namely

1. Roll the fondant slightly thicker

2. Less icing in the dirty icing stage

3. Don’t try piping again until I have some practice under my belt 😛

So, my lovelies, what have you achieved so far this year? Tell me something you’re proud of!! Then make a cake to celebrate. You know you want to.