Vanilla Icecream Pudding Surprise! (Another belated christmas post)

Since I made my confession about strawberries I have been feeling lighter, less freakish, so good in fact that I feel I must make another confession. I love everything that comes with a traditional Christmas – turkey, ham, roasted veggies (particularly roasted veggies! mmmmmm…) cranberry sauce, mustard. Christmas lunch and dinner leaves me completely full and happy. However, and be prepared because you may not believe me when I say, I almost never eat dessert at Christmas.

*whistles*

Yes, you read that correctly. This is the only meal all year that I do not finish with something sweet. Why? I don’t like fruit pudding, I don’t like fruit cake, I don’t like mince pies. It may seem like I don’t like fruit full stop, but that is not the case at all! It’s something to do with the combination of dried fruit, mixed peel and booze that just puts me off Christmas desserts. So this year, when I was given a mission by the mothership to make Christmas dessert, I decided to make a pudding but not of the traditional kind.

Enter…

Vanilla Icecream Pudding Surprise!

One of my birthday gifts from my beautiful mother was a Cuisinart Icecream Machine. I had been trying to make a decent icecream in it since November, but nothing was going to plan. Icecreams were too eggy, too icy, not setting, just plain sucky. This was going to be a Christmas showdown between me and that icecream. Armed with a recipe from the brilliant Guillaume Brahimi, I felt up to the challenge.

I followed the recipe exactly (I like to cut corners and substitute a bit here and there, but not this time baby!)

It looked pretty good churning away so I got to work on the ‘surprise’ part of the dish

What else would it be?

Guillaume’s recipe uses Mars Bars and Toblerone but I wanted to add the Cherry Ripe to make it a bit more festive, and because they were sitting in my cupboard begging to be used. And who can ignore a cry for help from a poor little chocolate bar? I only used 1.5 bars of each type of chocolate 1. so I could snack without detracting from the finished product and 2. because, well, it was just too much to put 6 full bars of chocolate in

I got a-chopping (and a-snacking!)

When the icecream was churned, I added the chocolate and poured it into the pudding basin

don’t forget to line your pudding basin with cling wrap so that you can get your pudding out when you want to eat it

you can use the overhang to cover the icecream to protect it in the freezer

Like this! Then pop it in the freezer overnight to set properly

Even though I lined the pudding basin with cling wrap, I still needed to dip the bottom of the bowl in hot water for a few seconds to help it come out properly. I made a chocolate sauce to go with the pud because it didnt feel like the usual custard and cream would be appropriate. However, I won’t post the recipe because although it was ok, it wasnt amazing and therefore not blog worthy.

mmmmm pud

yummo!

The icecream was smooth and creamy and vanilla-y and, studded with chocolate it was the perfect end to christmas day.

Although I made this recipe as a delicious christmas pud, you could do it in any shape or with any surprise. Im thinking M&Ms, nutella, snickers, oreos, the possibilities are endless! It’s almost like a Cold Rock at home. Mmmmmm…

So, my lovelies, if you made this icecream, what surprise would you add?

Vanilla Icecream Pudding Surprise – Adapted from the Christmas Tree Icecream Recipe by Guillaume Brahimi (published in the Sydney Morning Herald Good Living December 14, 2010)

Ingredients

375ml milk

375ml pouring cream (I used pure cream)

3 vanilla beans

8 egg yolks

150g caster sugar

1.5 Mars Bars (roughly chopped)

1.5 Toblerone bars (roughly chopped)

1.5 Cherry Ripe bars (roughly chopped)

Method

1. Bring the milk and cream to the boil

2. Slice the vanilla beans in half lengthways, scrape the seeds out and add to the milk and cream

3. In a separate bowl, whisk the egg yolks and sugar until well combined, then gradually add a third of the hot milk mixture and combine. Do this very gradually so as not to cook the eggs!

4. Put the egg and sugar mixture back into the pan with the remaining liquid and stir over medium heat until the custard reaches 80-85 degrees celsius or until it thickens enough to coat the back of the spoon

5. Immediately remove from heat and strain the mixture into a bowl (I had my bowl in an ice bath to make sure the mixture absolutely stopped cooking) and chill overnight

6. Churn in an icecream machine according to the manufacturer’s instructions. While the icecream is churning, line your mould with cling wrap leaving enough around the edges to fold over the top of the icecream

7. Once the icecream has reached desired consistency, stir in your chocolate and pour into the mould, folding the cling wrap over the top to protect it from the freezer. Freeze overnight or for 24 hours until set

8. To remove, dip the bottom of the mould in hot water for a few seconds and use the edges of the cling wrap to lift it out of the mould. Drizzle with the sauce of your choice and enjoy!

Another year older…

Last Saturday I woke up thinking “where did all the time go?” I looked behind the sofa, nothing. Under the bed? Nope, not there either. At the bottom of my handbag (a common hiding place for other necessities such as keys, lipstick, spare change)? Nuh uh!

I had to face the startling conclusion that the time had just gone. Poof. Another year, another notch on the wall. But birthdays are not supposed to be about doom and gloom! So despite the time sucking black hole following me around, I put on my apron and started baking for my annual afternoon tea party!

I had been secretly planning this for weeks and had hoped to have my tea party outside in the garden. But as E.E. Cummings would say, the world was “puddle wonderful” as the heavens opened for an almighty deluge. So the garden was not to be, but at least it cooled down so that the heat from my baking wasn’t so uncomfortable. See? Always a silver lining!

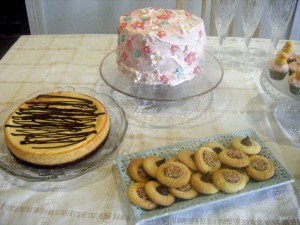
On the menu was:

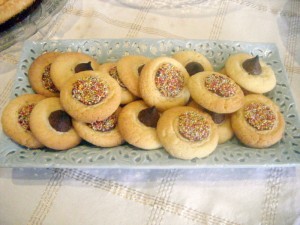
Thumbprint cookies

Vanilla cupcakes

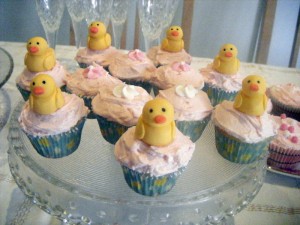
Mini vanilla cupcakes with fondant duckies

*squeak*!

Brownie Bottom Cheesecake (on the bottom left)


Violet Cream Cupcakes (With sugared violets courtesy of the fabulous Mrs S!) And yes that is the Bourke St Bakery Flourless Chocolate Cake hiding in the corner.

and of course…

Birthday Cake!!

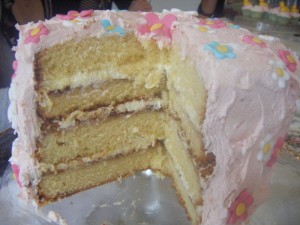
This time filled with strawberry jam and chantilly cream

(and yes, I can see my wonky layers! I didn’t realise chantilly cream was so unstable!)

I was particularly proud of my Violet Cream Cupcakes which came to me in a flash of inspiration. When I was in Adelaide recently, I fell in love with Haighs’ Violet Cream Chocolates. I loved them so much that I got to thinking… I had made Elderflower cupcakes, rosewater cupcakes, why not Violet ones? Furthermore, why not make chocolate cupcakes with Violet Buttercream Icing so that they would be Violet Cream Cupcakes? Brilliant!!

Thankyou to all my lovely friends who made it last Saturday and thanks also for the birthday wishes from those who were otherwise engaged. I had a wonderful time and I hope you all did as well!

So my lovelies, what food do you love to eat on your birthday?

(p.s. I think my camera lens might have been a bit grubby. Oops.)

Violet Cream Cupcake Recipe

Chocolate Cupcake Recipe – from theĀ Hummingbird Bakery Cookbook

Ingredients

100g plain flour

20g cocoa

140g caster sugar

1 1/2 tsp baking powder

40g unsalted butter

120ml full cream milk

1 egg

1/4 tsp vanilla extract

Method

1. Put the flour, cocoa, sugar, baking powder and butter in a bowl and mix until you have a sandy consistency

2. Whisk the milk, egg and vanilla together in a separate bowl

3. Pour half the milk mixture into the flour mixture and beat until smooth and combined

4. Slowly pour the remaining liquids in and beat until smooth

5. Spoon into paper cases and bake for 20-25 mins on 170 degree celsius

Violet Buttercream Icing

Ingredients

250 g icing sugar

80g unsalted butter

25ml milk

a dash of violet essence

purple food colouring

Method

1. Beat butter and sugar until combined

2. gradually add milk until desired consistency is reached

3. Add a dash (maybe half a teaspoon) of violet essence and mix well. Add more essence as desired (bear in mind that if you are making this in advance the flavour will intensify the longer they are left)

4. add food colouring until desired colour is reached

Vanilla Layer Cake (and the joys of pink food)

One of these days I think my kitchen bench is going to collapse under the weight of all my cook books. Truly. I love flipping through the glossy pages of perfectly styled pictures. I love coming across unexpected gems. I love the wonderful prose that accompanies so many cookbooks these days. Granted, Im not sure I need twenty different recipes for white sauce. But you can never have too many chocolate cake recipes! The quest for perfection never ends.

Whenever I feel guilty about how many cookbooks I have I always like to console myself with the fact that I have cooked at least something from every cookbook in my collect. At least I thought I had…

Last year my sister bought me the Magnolia Bakery Cookbook. Hooray! After my excitement wore off I was quickly put out by the complete lack of understandable measurements included in the book. Does anyone outside of America know how many grams one stick of butter is? Ok, so I can google it but how would you interpret “one package of instant pudding mix”? Which packet? Much much should it make? What kind of pudding? ARGH! Everything is also in cup measurements without being accompanied by gram or ounce equivalents. This would be fine, except that the measurement for American cups are different to Australian ones… uh oh.

So there it sat. Lonely and unloved on my bookshelf. Until it was called upon, one courageous wednesday afternoon, to create a truly amazing Vanilla Layer Cake.

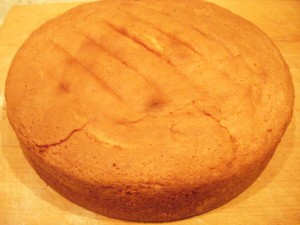
I decided to take the plunge and do my best with the equipment and knowledge I had. The mix looked pretty good before it went into the oven, and when it came out, it looked even better!

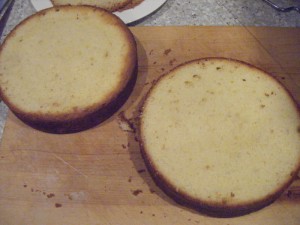
The mixture produced two flat but pretty tall cakes. I promptly cut their tops off to even them up, and cut them each in half. Cruel? Maybe. Thats just how I roll.

So far, so good.

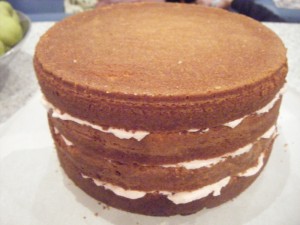
The next decision was what to use for a filling. After careful consideration I went with the very original choice of vanilla buttercream. Can you blame me? It was pink!

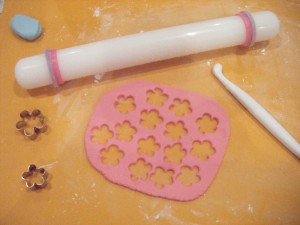
I used my new cutters and super sweet rolling pin to cut out some fondant flowers

Then went to town!

I felt like there was still something missing from the decoration but as it was only a practice, I figured it would still be ok! And yes, my cake it a little slanty. But it was… erm… intentional?

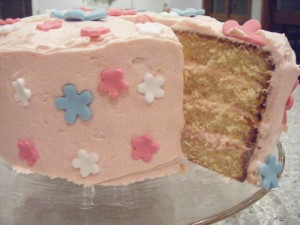
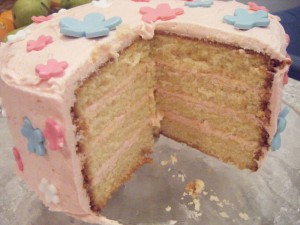
In the end I was left with a pretty pink four layer vanilla cake! It tasted pretty good too!

And it cuts pretty stable pieces.

It also has a curious knack for disappearing incredibly quickly…

I have a theory. All food tastes better if its pink. Now, my lovelies, would you agree?

Traditional Vanilla Birthday Cake Recipe – From The Magnolia Bakery Cookbook

Ingredients

1 cup (8 ounces) unsalted butter

2 cups sugar

4 large eggs

1 1/2 cups self raising flour

1 1/4 cups plain flour

1 cup milk

1 tsp vanilla extract

Method

1. Preheat oven to 350 degrees fahrenheit

2. Cream the butter until smooth

3. Add sugar gradually and beat until fluffy (about 3 mins)

4. Add the eggs one at a time, beating well after each addition

5. combine the flours and add in four parts, alternating with the milk. Beat well after each addition

6. Add vanilla extract and mix in well

7. Divide batter between two 9 inch round cake pans (the recipe said 3 but I only had two and it worked out pretty damn well) and bake for 20-25 mins or until a skewer comes out clean

8. Let the cakes cool in the pans for ten minutes then remove from the pans and cool completely on a wire rack

9. cut into however many layers you wish and fill with your choice of filling!

Traditional Vanilla Buttercream – From The Magnolia Bakery Cookbook

Ingredients

1 cup (8 ounces) unsalted butter

8 cups icing sugar

1/2 cup milk

2 tsp vanilla extract

Food colouring

Method

1. Place butter in a large mixing bowl with four cups of icing sugar, milk and vanilla extract. Beat until smooth and creamy.

2. Add the remaining sugar one cup at a time, until the icing is the consistency you require (you might not need to add all the sugar, its all up to you)

3. Add food colouring as desired

I want to marry this cake… Bourke St Bakery’s Flourless Chocolate Cake

So im a Dessert Whore. I proclaim my love for one dish before quickly moving on to professing my undying love for another. Does this make me insincere? NO! Rather, I like to think of myself as a Mormon husband in the world of baked goods, collecting my many wives as I go but never neglecting to care for the wives I have already accrued. Who says I can’t have my cakes and eat them?

I was on the hunt for something truly spectacular. After all, the Mothership was turning the big 6 0 and that only happens once. It was my chance to show her how grateful I am for her putting up with me and my messiness for the past twenty something years. Now, you may not know this, but the Mothership does not run on fuel, she does not have a flux capacitor, she isnt solar powered. No, the Mothership runs on chocolate. A truly ingenious invention! Therefore, the birthday cake I was to make had to be something chocolaty in the extreme.

Does this look chocolaty enough? No? Appearances can be deceiving…