An even better Lime Syrup Cake

So I am a little obsessed with limes. And when they get made into delicious things like…

lime syrup cakes

can you blame me? Now if you’re feeling like you’ve got a bit of deja vu, then you wouldn’t be too far off. I did post the CWA Lime Cake way back in 2010 when I began this blog. But with the second birthday of this little blog of mine swinging round, I thought i’d bring back my old favourite but with a little delicious tweak.

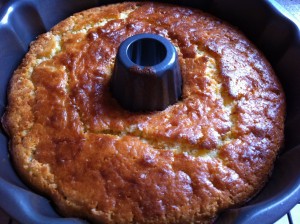
I saw this recipe on the beautiful Kiki’s blog after i’d scored a bag of limes ridiculously cheaply. Apart from making a Key Lime Pie and some watermelon, lychee and lime cocktails, Lime Syrup Cake was the perfect way to use these babies up. And the Women’s Weekly recipe that Kiki used intrigued me with its addition of ricotta. What I love about the CWA recipe is the beautiful light buttery texture of the cake as well as the lovely limey syrup left at the bottom. This recipe is much more dense but infinitely soft and oh-so-lime-syrupy!

I used Greek Style Yoghurt instead of ricotta because I couldn’t get my lazy ass to the shops to buy some. Oops.

But look at the cute tea cosy behind it!

If you’re currently suffering from the chilly turn in Sydney, I’m sure this hot, fresh out of the oven cake will warm you up

The super moistness and limeness of this cake comes from a little lime in the batter but mostly the lime syrup trickled over the top while it is still warm.

I recently discovered Weis Vanilla Bean Icecream. This has to be hands down the best vanilla ice-cream i’ve had so far. A few scoops of this baby cuts through the lime if you’re not such a fan of the sour.

mmmmmmmmmmmm

and an action shot, just so you can feel jealous. But better than feeling jealous, you can go get some limes and make this freakin cake! You won’t be disappointed!

So, my lovelies, do you love limes? And what do you like to eat to keep away these winter chills that are currently invading Sydney?

Lime Syrup Cake – Adapted from The Australian Women’s Weekly

Cake Ingredients

200g butter

1 tablespoon lime zest

1 cup (220g) caster sugar

3 eggs, separated

250g greek yoghurt

1/2 cup (125ml) milk

1 1/2 cups (225g) self raising flour

Syrup Ingredients

1/3 cup (80ml) lime juice

1/4 cup (60ml) water

2/3 cup caster sugar

Method

Preheat oven to 180deg (160deg if fan forced). Grease a 20cm bundt pan well with extra melted butter.

1. Beat butter, rind and sugar in small bowl with electric mixer until light and fluffy

2. Beat in egg yolks, yoghurt and milk

3. Transfer to a large bowl and stir in sifted flour.

4. Beat egg whites in a small bowl until soft peaks form

5. Fold into batter in two batches then pour into a greased 20cm bundt pan. Bake on 160 degrees for 40-50 mins. Check regularly as mine was truly cooked by then

6. Turn cake out onto a wire rack and cool for 5 mins before covering in syrup


Lime Syrup Method

1. During the last 10 mins of the cake baking, begin making your syrup

2. Stir the lime juice, water and sugar in a saucepan over a low heat until the sugar has dissolved. Bring to the boil.

3. Boil uncovered for 10 mins, keeping a careful eye on it! Don’t let it caramelise! In the mean time, stab your cake all over it’s surface with a skewer to help the syrup absorb

4. When the syrup has thickened a little, take the pan off the heat and pour gently over your cake.


Edible Christmas Gifts: Christmas Hot Chocolate

Dear Time,

Why do you move so quickly? Only yesterday it was weeks until Christmas and today I wake up to find that there are only three more sleeps! Slow down loser.

Love, Katie.

Anyone else wondering where all that time went? I like to think that i’m pretty organised when it comes to Christmas (laugh all you want people, but despite my lack of organisation throughout the year I do get my Christmas shopping done super early). But it’s not the shopping that has fazed me this year, rather its all the co ordination of the cooking, cleaning, seeing friends etc. At the moment i’m procrastinating before working up the energy to decorate my gingerbread house (post to come!) and cook my potato salad for a Christmas Party tomorrow. Of course, in the interim I thought I would have a crack at another quick and easy edible Christmas gift, you know, in case you aren’t quite as organised in the shopping department as I am. (Let me take this moment to gloat because, i’m clearly behind throughout the year. Give me this one!)

I saw this recipe for Hot Cocoa at My Baking Addiction (another find through Twitter. Loving that!) and thought that this would be a great way to use up some sweet little jars I bought, and it would make great Christmas gifts. PLUS it meant that I could buy marshmallows, because who doesn’t have marshmallows all the time with their hot chocolate? I thought I would make it a little more christmassy by adding in some cinnamon and I reduced the amount that I made, but otherwise the recipe was great as it was.

marshmallowwwwssssss…..

all you need to do is sift all the ingredients together. I sifted mine a few times to get the sugar really fine otherwise you’re left with white specks throughout your mix

then bottle!

then repeat!

p.s. how cute are these jars? $2.5o from a little reject shop style store. Make sure that you wash them thoroughly in hot soapy water though.

If you are totally stuck for ideas this Christmas, I would recommend this. Who doesn’t like hot chocolate? And why would you be friends with someone who doesn’t like hot chocolate? I’m pretty sure thats not normal.

If you want to view the original recipe you can find it here.

Otherwise,

Christmas Hot Chocolate Mix – yield is roughly 2 and 3/4 cups

Ingredients

1 cup icing sugar (powdered sugar or confectioners sugar)

1/2 cup cocoa powder (dutch processed is best)

1 1/4 cup powdered milk

1/2 tsp salt

1 tsp cornflour

1 tsp cinnamon (add more according to your taste)

Method

1. Mix all ingredients together and sift several times. The more times you sift, the finer your mix will be.

You could add more or different spices according to what you like or what your giftee would like. Be creative!

2. Pour into jars and seal

3. To make the hot chocolate, add to hot milk or water and stir thoroughly

Winter Wishing – Quince Cake

What’s in the pot?

Well… now that the weather has turned in time for Spring, do you really care what’s in the pot? Clearly it’s something that involves baking and we all know that the hot Australian summer is not conducive to baking. But Spring/Summer baking is not what this post is all about. While I love the sunshine and flowers, a part of me yearns for the sharp clarity of winter mornings and the satisfaction of warm winter desserts. So this post is a throw back to all the things we wish for during winter. Mostly…

Quinces!

I hate that the Quince season is so woefully short. I hate that Quinces are not readily available as they should be. I hate that I don’t have my own Quince tree in my own backyard. And while I am trying harder to make the most of produce that is in season, I wish that Quinces that had been transported in cold storage did not taste so awful. Then we wouldn’t have to wait until winter to enjoy them. But all things come to those who wait, and as I wait patiently all year I know that I will always have time for at least one Quince Cake during winter.

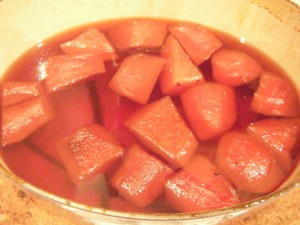
Look at those beautiful pieces of quince. Yummo!

This particular recipe is quite simple, the only time consuming part is poaching the quinces but

1. having the oven on for so long keeps the house warm

2. the smell is gorgeous! I would like nothing better than to have my house continuously smell like quinces poaching


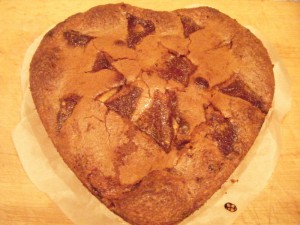
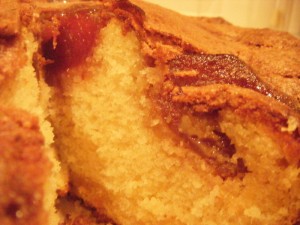
 So in the end, after all the deliciousness and warmth of the poaching process you end up with a wonderful buttery, soft, sweet, spicy cake. Particularly tasty with the crunchy munchy cinnamon topping and jewels of quince peeking out.

mmmmmmmm!

So, my lovelies, what seasonal food would you eat all year round if you could? I’ll give you three wishes!


Poached Quince – From The Cook’s Companion by Stephanie Alexander

Ingredients

6 Quinces, peeled and cored

2.25 litres sugar syrup (2 parts water to 1 part sugar, heat and dissolve sugar to make the syrup)

1 vanilla bean

juice of 1 lemon


Method

1. Put sugar syrup into a large enamelled cast iron casserole dish along with the quinces, vanilla bean and lemon juice

2. Cover tightly and bake at 150 degrees celsius  for at least 4 (and up to 8) hours until the quinces are a deep red colour. Do not stir.

3. Cool


Quince and Cinnamon Cake – From The Cook’s Companion by Stephanie Alexander

Ingredients

180g softened butter

150g caster sugar

135g plain flour

135g self raising flour

pinch of salt

2 large eggs (lightly beaten)

70ml milk

1/2 cup almond meal

poached quinces

Topping

60g butter

1/2 cup caster sugar

2 tsp cinnamon

2 large eggs


Method

1. To make the topping, melt the butter and stir in the sugar and cinnamon, then allow to cool a little. Whisk the eggs and stir into the cooled butter mixture

2. Cream the butter and sugar until light and fluffy

3. Mix in flours and salt

4. Mix the eggs with the milk and add to the flour mixture. Mix to a softish dough.

5. Spoon the batter into a prepared tin (it will rise quite a bit so don’t overfill) and sprinkle the almond meal over the top

6. Arrange the quinces cut side up on top of the batter and spoon the topping over and around the quinces.

7. Bake at 180 degrees celsius for 50 mins-1 hour

8. Serve warm with cream


Going nuts for donuts! (version 2.0)

Who could forget the fabulous month where Daring Bakers‘ introduced us to the joys of home made donuts? I certainly couldn’t! Which is why I found myself craving the yeasty golden goodness of these treats in the chilly lead up to Easter this year. I had a few issues with the recipe from the October challenge and wanted to see if following the advice of other Daring Bakers would further improve the results of this already astounding recipe. Turns out, they do. Sorry for the anti climax.

But what could be anti climactic about risen dough? Look at this baby rise! I followed the instructions to the letter this time and resisted adding any more flour, despite the extreme wetness of the dough. Sometimes I think that there is nothing more joyous than coming back after an hour and seeing that beautiful crown of dough peeking over the rim of the bowl!

I didn’t have the luxury of using the S family kitchen with all its adult supervision and granite benchtops, not to mention tiled floors. So I was extra careful in my own kitchen (particularly after the poached pears debacle! My stove top is still recovering…). I kitted myself out with numerous bath towels to smother any small fires that may arise and was generally much more careful than I would otherwise be.

This is one well risen dough! Look at that honeycomb of air bubbles…

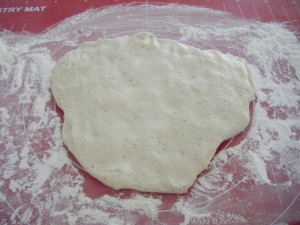
I patted the dough out onto my baking mat. It was still much too wet to roll out, although it had dried a little during the rising process.

I cut the dough into donut shapes using concentric circles

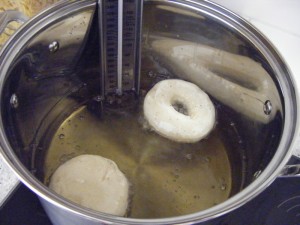
and banished them to their oily doom!

Muahaha!

Mmmmm… golden fried goodness

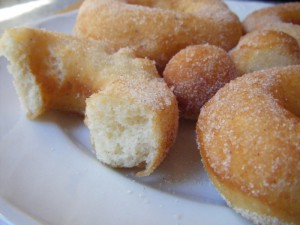
After dipping them into the sugar cinnamon mixture they came out looking perfect!

Light and tasty and just pretty damn good!

I think the long cold rise over night in the fridge gives it a greater depth of flavour

And so my second foray into donut making was a great success. But do you think I stopped at just sugar cinnamon donuts? Of course not!

So I made sugar cinnamon strawberry jam donuts!

These babies went down even better than the original recipe donuts. I’m sorry I don’t have a middle shot to show you, but the insides are filled with strawberry jam. Mmmmmmmmmmmm….

The only alteration you need to make to the recipe is to cut one round without a hole in the middle, let the donut cool and cut a slit into the side of it. Insert a piping nozzle and squeeze strawberry jam inside. Fill up as much as you want!

The recipe can be found here.

So my lovelies, what is your favourite flavour of donut? Do you like them plain, or do you go all out with jam and cream?