Coconut and Strawberry Cookies and an Exciting Announcement!

So, my lovelies, I believe this year has been the year of the cookie for me. Most of my baking recently has been cookies. And really, can you blame me? These tiny, tasty treats are perfect for snacking, afternoon tea, a sneaky midnight munch or, lets face it, a meal themselves. Don’t judge. Im sure you’re guilty of having cookies for lunch. Or breakfast. Or dinner. Or all three…


munch munch munch!

But before I get into the fragrant delight that these Coconut and Strawberry Cookies are, I want to share with you an exciting development in the world of my blog. I was recently featured on the SBS Food website! Yay! I was contacted a little while ago by a lovely lady from SBS who sent me some questions tailored to my blog for me to answer. A took a lovely snap of me at a recent wedding to pop on the page and hey presto! You have what you see below

you can read all about it by clicking on this link.

So i’ve been full of excitement! And cookies. I thought that this Christmas I would make my co workers cookies as presents. Lucky them! Actually, lucky me. These cookies are delicious and make the house smell ah-mazing. I’m thinking that this blog is going to see a whole lot of coconut during the new year. Im also thinking that a whole lot of cookie dough is going to be consumed right through 2013.

yum yum yum!

Its a soft and fragrant dough that needs to be refrigerated before its rolled out. If you can keep it out of your belly long enough to get it into the fridge that is…

then you cut out your little round with a sweet petite heart in the centre.

Or close enough to the centre.

Yes, maths and symmetry is not my strong point.

Dust the baked babies with icing sugar

and fill with sweet, sweet strawberry jam

ohhhhhhhhh yeah.

then pop these into a jar and gift to someone you really love!

And I mean REALLY

because you are not going to want to part with these for anyone less.

So, my lovelies, what do you think of my little interview?

Coconut and Strawberry Cookies – From Donna Hay Magazine Dec/Jan 2012

Ingredients

125g butter

1/2 cup (110g) caster sugar

1 egg

1 tsp vanilla bean paste

1 1/2 cups (225g) plain flour

1/2 tsp baking powder

1/2 cup (40g) desiccated coconut

icing sugar for dusting

1/2 cup strawberry jam

Method

1. Beat the butter and caster sugar in an electric mixer until pale and creamy

2. Add the egg and vanilla and mix until combined

3. Add the flour, baking powder and coconut and mix until combined

4. Turn the dough out onto a strip of cling film, wrap up and pop into the fridge for 30 mins or until firm

5. Cut the dough in half and roll both parts between two strips of baking paper until 5 mm thick

6. Using a 5cm round cookie cutter cut 12 rounds from each sheet of dough

7. using a small heart shaped cookie cutter, cut out the centre of 12 of the rounds and remove

8. Bake for 8-10 mins until golden

9. Allow to cool

10. spread a little strawberry jam on the whole rounds

11. Dust the cut rounds with icing sugar, then place on top of the whole rounds that have been spread with jam

12. Give them away… if you can…

The Strawberry Affair Continues With: Shortbread Cookies with Strawberry Jam

What do you love more than a cup of hot tea and a jammy biscuit?

Nothing?

Thats as it should be.

Well… not strictly true but we do all love a hot beverage and a tasty cookie don’t we? So what better to make your Valentine than these cute jammy shortbread cookies? They’re red and heart shaped and oh so tasty!

See?

Another recipe from Apples for Jam by Tessa Kiros, these cookies are deceptively easy to make and are great for using up any extra jam you may have lying around say if you recently made a batch of Strawberry and Vanilla Conserve… It’s basically two layers of delicious shortbread sandwiched with strawberry jam and baked until golden and crumbly.

All you need to do is whip up the dough, spread some jam, cover it with another piece of dough and slip that sucker in the oven

Bam! Warm, delicious shortbread.

I thought I would be tricky and cut some shapes into the top piece of dough before putting it on top of the jam. Then I cut rounds out with my circular cookie cutter. You can cut any shapes you like and you could probably cook it pre-cut if you wanted as well. It’s quite a versatile recipe so have a play around with it if you like. I love the fact that they are very similar to Arnotts Raspberry Shortcake cookies and Jammy Dodgers. Make them at home from your left overs and you may just have a double win on your hands.

Yummo!

So if you’re not quite sure what to get your valentine, or if you *gulp* forgot… have a crack at these. Definitely a heart melter. I definitely love myself more after giving them to myself for valentines day…

So, lovelies and lovers, what are you up to this valentines day?

Jam Shortbread – From Apples for Jam by Tessa Kiros

Ingredients

100g butter

100g caster sugar

200g plain flour

1/2 tsp baking powder

1 egg, lightly beaten

a few drops vanilla extract

approx 200g strawberry jam

Method

1. Work the butter and sugar together with your hands until combined

2. Add flour and baking powder and work them in

3. Knead egg and vanilla into the mix and keep working until smooth and well combined

4. Cover with plastic wrap and place the dough into the fridge for 30 mins

5. Divide the dough in half and roll out to a thickness of 2-3 mm

6. Spread the jam over the dough

7. Roll out the second piece of dough and place over the jam (you may want to cut some shapes into this dough before placing on top of the jam, or you may not!)

8. Place into an oven preheated to 170 degrees celsius and bake for 15 mins or until lightly golden

9. Remove from the oven and cool for a few minutes. Cut into desired shapes and leave to cool completely (or eat warm with some tea!)

The Colours of Summer – Strawberry Sorbet

So the sun is out, the sky is blue and there are still so many sweet, sweet strawberries. What more could you ask for? Today at least, it really feels like summer. One of the things I love about this season is the number of colours around. The blue green of the ocean, the bright and pastel colours of all the flowers in bloom, gorgeous yellow sun. In 2011 I figured that this year should herald a new swimming costume and towel in honour of the first summer in years i’ve actually been able to spend at the beach.

Pretty lilac and icecream colours!

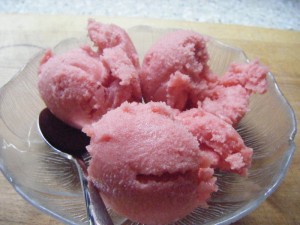
To go with this new injection of colour, I felt it was time I made an icy treat worthy of being a post swim snack. Strawberry Sorbet. Mmmmmmmm a very simple recipe with few ingredients and minimal prep time. Just the thing to make on a day like today.

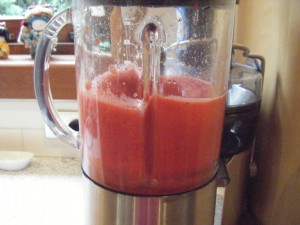
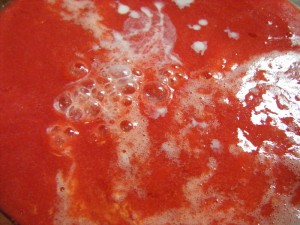
This recipe is very very easy to make, as long as you have lots of pretty little strawberries at your disposal. You need to puree your washed and de-headed strawberries in a blender until smooth. Always make sure you clean your blender properly. When I took the lid off to put in the strawberries, there was an awful smell in my blender. I took it apart and realised I hadn’t washed it properly the last time I used it and some of the seals had dried up mould on them. Um… extra protein? No! I cleaned that sucker thoroughly this time – before AND after strawberrying.

It’s clean now. I promise!

Then you need to pop some sugar, lemon juice and lemon peel in a pan with some water and cook to dissolve the sugar.

Add the strawberry puree and a few tablespoons of milk. (This seemed to curdle a little so I probably wouldn’t bother with the milk next time)

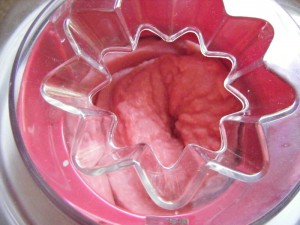
Churn in your machine

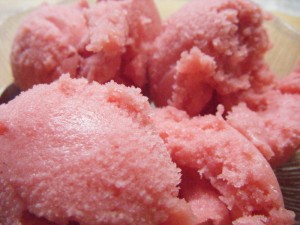
And voila! Sweet, soft, icy strawberry sorbet. Best thing to cool you down on a hot summer day.

And it matches my sunburn. Ouch!

So. lovely readers, what do you love most about summer? Or do you hate summer and can’t wait until winter? Im intrigued!

Strawberry Sorbet – From Apples for Jam by Tessa Kiros

Ingredients

500g fresh strawberries, stalks and leaves removed

180g sugar

Juice of half a lemon

One fairly long strip of lemon peel (I used a vegetable peeler – try not to get any pith with your peel)

375 ml water

4 tbsp milk (optional)

Method

1. Puree the strawberries until they are totally smooth (I sieved the mixture afterwards because I HATE seeds in my icecream, but if you like to include them, just put the mixture into a medium sized bowl and bother sieving)

2. Put the sugar, lemon juice and lemon peel in a pan with the water and bring to the boil. Cook, stirring until the sugar has completely dissolved then take off the heat and cool for 10 minutes

3. Take out the lemon peel and pour the sugar mixture into the strawberrry puree.

4. Here is where you add the milk if you want to. When I added it to mine, it seemed to curdle and didnt combine properly until I mixed it very vigorously. It didn’t seem to harm the sorbet at all so I would say go with it unless you have an objection to milk. I might skip this step though next time.

5. Put your mixture into the fridge until it is completely chilled. You might want to do this overnight. Then add to your ice cream machine and churn according to the manufacturers instructions.

Edible Christmas Gifts #1: Strawberry and Vanilla Conserve

I have a confession. It may shock you.

I don’t like strawberries.

Sometimes I feel like i’m the only person on the planet who doesn’t like fresh strawberries. Not dipped in chocolate, not with fresh cream on a hot summer’s day, not even freshly picked. I’ve never been able to figure out why. It’s not like my aversion to fresh tomatoes (which make me throw up), I just don’t like them. But here’s the kicker… I LOVE strawberry jam.

After buying Gifts from the Kitchen: 100 Irresistible Homemade Presents for Every Occasion by Annie Rigg, I decided that I was going to be making some delicious christmas gifts for my friends and family. Each year I try to make some jam, sometimes a success (2009 Blueberry Jam) sometimes a failure (2008 Peach and Nectarine Jam… and I use the word ‘Jam’ very loosely here). This year I was determined to try the old faithful Strawberry and Vanilla Conserve. The recipe was straightforward and very easy to follow and, unlike many other recipes, it did not make litres and litres of jam that required bottles and bottles to contain it. This recipe makes enough to fill 3 X 125mL jars and doesn’t require a giant saucepan.

Firstly, you must make sure that you sterilise your jars. Not necessarily as difficult as it sounds. I bought these jars for $5.95 (a tad expensive but they were all I could find at the time) from The Essential Ingredient in Rozelle.

They came with instructions on how to sterilise them, but here is how I do it. First I take the rubber seals off then I wash the jars in hot soapy water then pop them on a tray and into an oven heated at 200 degrees celsius for 20 mins. When the jars are cool I pop the seals in boiling water for 1 minute then stick them back on the lids. The recipe can be found at the end of this post, but let me walk you through it.

After sterlising your jars, you need to behead your strawberries.

MUAHAHAHAHAHAHAH!

And chop them up into tiny pieces. (about 550g of strawberries are needed)

Then pop 450g preserving sugar (I use the CSR because its the only one I can find, and it’s pretty good) along with the juice of one lemon and the seeds and pod of one vanilla beans in a large sized heavy based saucepan. (I used two vanilla beans because… well… I just love them)

Put over a low heat until the sugar has dissolved.

Add your strawberries and stir to make sure they are coated with the sugar mixture.

Leave to stand for around 1 hour so that the fruit can soften and release its tasty juices into the syrup.

Return the pan to a medium heat and cook at a steady boil without stirring for 20 mins or until it reaches setting point. Here are a few ways to tell if it has reached setting point. I prefer to use the chilled saucer method. (When I made this, I had to leave it for over 30 mins before it reached setting point, so if it takes a while, do not stress! Just keep testing every nowand then and be careful not to burn your jam.

When your jam has reached setting point, take it off the heat and pour it into your waiting jars.

Tah Dah! Fresh pots of Strawberry and Vanilla Conserve!

The jam will thicken after it has rested for a while, but the beauty of this recipe is that it tastes delicious so even if something goes wrong and it doesn’t set you can still use it as a sauce over ice cream or some delicious dessert. Mmmmmm!! Win win!

It is a relatively fuss free recipe due to the smaller yield so it is not too late to make this for someone for Christmas. Get cooking!

And, my lovelies, what kind of jam is your favourite? After trying Kaya and Champagne jelly, I am eager to try some other flavours!

Strawberry and Vanilla Conserve – Adapted From Gifts From the Kitchen by Annie Rigg

Ingredients

450g preserving sugar

juice of 1 lemon

2 tbsp water

1 vanilla pod (feel free to use more if you wish)

550g small, ripe strawberries (hulled and chopped)

Method

1. Put the sugar, water and lemon into a large heavy based saucepan or preserving pan. Split the vanilla pod and scrape the seeds into the sugar mixture. Add the pod and place over a low heat until the sugar has dissolved

2. Remove the pan from the heat and tip the strawberries in. Stir gently to coat the strawberry pieces in syrup then leave to stand for around 1 hr

3. Return the pan to a medium heat and cook at a steady boil for around 20 mins, or until it reaches setting point. Keep testing for setting point and don’t worry if it takes longer but make sure you resist the temptation to turn your heat on much higher or you might burn your jam on the bottom.

4. When the jam has reached setting point, take the pan off the heat and let the mixture stand for 10 mins to let the strawberries settle.

5. Pour or ladle the mixture into waiting bottles (it should take 3 and a bit 125mL bottles) and seal immediately. They will keep for months unopened in a cool, dark cupboard or up to 1 month in the fridge once opened.